
-Western-Pacific-Jan-1945-NARA-01.jpg) |
-Western-Pacific-Jun-1944-NARA-01.jpg) |
-Western-Pacific-Jun-1944-NARA-01.jpg) |
-unit-crest-or-emblem-0A.jpg) |
-with-Secretary-of-the-Navy-Frank-Knox-and-Annie-Reid-Knox-Virginia-30th-Aug-1943-NH-53429.jpg) |
-Western-Pacific-30th-Jun-1944-NARA-01.jpg) |
-Western-Pacific-4th-Jul-1944-NARA-01.jpg) |
-Western-Pacific-18th-July-1944-ASC1.jpg) |
-Western-Pacific-18th-July-1944-ASC2.jpg) |
-Western-Pacific-18th-July-1944-NARA-01.jpg) |
-Western-Pacific-18th-July-1944-NARA-02.jpg) |
-Western-Pacific-19th-Jul-1944-NARA-01.jpg) |
-in-Jan-1945.jpg) |
-after-strikes-on-Japanese-shipping-China-Sea-Jan-1945-80-G-469319.jpg) |
-after-strikes-on-Japanese-shipping-China-Sea-Jan-1945-NARA-01.jpg) |
-June-1944-NARA-01.jpg) |
-1st-May-1944-NARA-01.jpg) |
-Southwest-Pacific-24th-Apr-1944-NARA-01.jpg) |
-Southwest-Pacific-24th-Apr-1944-NARA-02.jpg) |
-via-the-hangar-catapult-25th-Feb-1944-01.jpg) |
-Western-Pacific-for-raid-on-Formosa-12th-Oct-1944-NARA-01.jpg) |
-NARA-01.jpg) |
-at-Kwajalein-Harbor-5th-May-1944-NARA-01.jpg) |
-Southwest-Pacific-25th-Apr-1944-NARA-01.jpg) |
-preparing-for-a-strike-against-Nansei-Shoto-Japan-10th-Oct-1944-NARA-01.jpg) |
-preparing-for-a-strike-against-Nansei-Shoto-Japan-10th-Oct-1944-NARA-02.jpg) |
-16th-April-1945-01.jpg) |
-Western-Pacific-June-1944-NARA-01.jpg) |
-Central-Pacific-3rd-May-1944-NARA-01.jpg) |
-Central-Pacific-3rd-May-1944-NARA-02.jpg) |
-Western-Pacific-June-1944-NARA-01.jpg) |
-Western-Pacific-June-1944-NARA-01.jpg) |
-Western-Pacific-June-1944-NARA-01.jpg) |
-Western-Pacific-June-1944-NARA-01.jpg) |
-Western-Pacific-June-1944-NARA-01.jpg) |
-during-strikes-on-Formosa-12th-Oct-1944-80-G-284466.jpg) |
-raid-on-Formosa-12th-Oct-1944-80-G-284464.jpg) |
-on-6th-June-1945-80-G-367441.jpg) |
-on-6th-June-1945-80-G-367442.jpg) |
-01.jpg) |
-heading-to-Marianas-June-1944-01.jpg) |
-heading-to-Marianas-June-1944-ASC1.jpg) |
-heading-to-Marianas-June-1944-NARA-01.jpg) |
-01.jpg) |
-7th-Aug-1944-01.jpg) |
-7th-Aug-1944-02.jpg) |
-7th-Aug-1944-03.jpg) |
-South-Pacific-13th-Jun-1944-NARA-01.jpg) |
-South-Pacific-13th-Jun-1944-NARA-02.jpg) |
-Southwest-Pacific-28th-Apr-1944-NARA-01.jpg) |
-Southwest-Pacific-28th-Apr-1944-NARA-02.jpg) |
-Southwest-Pacific-29th-Apr-1944-NARA-01.jpg) |
 |
 |
 |
 |
 |
 |
 |
 |
 |
 |
 |
 |
-planes-of-TF38-off-Samar-on-26th-Oct-1944-80-G-47012.jpg) |
-off-Okinawa-16th-April-1945-80-G-331613.jpg) |
-viewed-from-USS-Wasp-off-Kyushu-Japan-18th-Mar-1945-80-G-310039.jpg) |
-off-Okinawa-16th-April-1945-80-G-331610.jpg) |
-off-Okinawa-16th-April-1945-80-G-339259.jpg) |
-off-Okinawa-16th-April-1945-80-G-339260.jpg) |
-off-Okinawa-16th-April-1945-80-G-339261.jpg) |
-off-Okinawa-16th-April-1945-80-G-339262.jpg) |
 |
-12th-Jan-1945-80-G-469317.jpg) |
-01.jpg) |
-9th-Jan-1945-NH-95606.jpg) |
-9th-Jan-1945-NH-95606-A.jpg) |
-plane-west-of-Bataan-14-Dec-1944-NH-95602.jpg) |
-at-the-Newport-News-Virginia-30th-Aug-1943-01.jpg) |
-at-the-Newport-News-Virginia-30th-Aug-1943-NH-53433.jpg) |
 |
 |
-a-Navy-transport-in-San-Francisco-Bay-California-USA-circa-1945-NH-83398.jpg) |
-receives-fuel-and-ordnance-from-USS-Sacramento-(AOE-1)-in-the-South-China-Sea-June-1967-USN-1142142.jpg) |
-20mm-gun-crews-standing-by-as-her-planes-hit-Tokyo-Japan-16th-Feb-1945-80-G-469289.jpg) |
-20mm-gun-crews-standing-by-as-her-planes-hit-Tokyo-Japan-16th-Feb-1945-80-G-469289R.jpg) |
-40mm-gun-crews-protecting-their-ship-as-her-planes-hit-Tokyo-Japan-16th-Feb-1945-80-G-413915.jpg) |
-40mm-gun-crews-protecting-their-ship-as-her-planes-hit-Tokyo-Japan-16th-Feb-1945-80-G-413915x.jpg) |
-40mm-gun-crews-protecting-their-ship-as-her-planes-hit-Tokyo-Japan-16th-Feb-1945-80-G-416841.jpg) |
-aerial-reconnaissance-photo-of-an-enemy-installation-over-Bataan-Peninsula-Luzon-Philippines-14th-Dec-1944-NH-95829.jpg) |
-aerial-reconnaissance-photo-of-an-enemy-installation-over-Bataan-Peninsula-Luzon-Philippines-14th-Dec-1944-NH-95832.jpg) |
-aerial-reconnaissance-photo-of-enemy-installations-Bataan-Peninsula-Luzon-Philippines-14th-Dec-1944-NH-95830.jpg) |
-aerial-reconnaissance-photo-of-enemy-installations-Bataan-Peninsula-Luzon-Philippines-14th-Dec-1944-NH-95831.jpg) |
-aerial-reconnaissance-photo-of-enemy-installations-Bataan-Peninsula-Luzon-Philippines-15th-Dec-1944-NH-95832.jpg) |
-and-a-light-cruiser-refuel-from-an-oiler-on-Bonins-Raids-3rd-Aug-1944-80-G-367245.jpg) |
-at-sea-during-the-Okinawa-Operation-seen-from-USS-Belleau-Wood-29th-Mar-1945-80-G-K-5184.jpg) |
-being-prepared-for-her-lunch-at-the-Newport-News-Virginia-28th-Aug-1943-NH-75604.jpg) |
-damaged-TBF-Avenger-lands-damaged-after-strikes-on-the-Marianas-area-13th-June-1944-80-G-367213.jpg) |
-experiences-a-near-miss-after-it-was-attacked-by-a-Japanese-aircraft-off-Japan-19th-March-1945.jpg) |
-F6F-5-pilots-rushing-to-their-planes-to-attack-Japanese-shipping-in-the-China-Sea-Feb-1945-80-G-469383.jpg) |
-firing-her-starboard-5-inch-gun-battery-during-practise-Pacific-Jun-1945-80-G-K-5708.jpg) |
-firing-her-starboard-5-inch-gun-battery-during-practise-with-USS-Bon-Homme-Richard-(CV-31)-Pacific-Jun-1945-80-G-K-5704.jpg) |
-flight-deck-after-planes-from-CVG-2-returned-from-their-raid-on-Marinas-Jun-1944-NARA-01.jpg) |
-Grumman-F6F-5-Hellcats-VF-17-warm-up-prior-to-take-off-for-raids-on-Tokyo-Japan-16-17-Feb-1945-80-G-469292.jpg) |
-Grumman-F6F-5-Hellcats-VF-17-White-11-and-41-warm-up-prior-to-take-off-for-raids-on-Japan-5th-Jan-1945-NARA-01.jpg) |
-leaving-Pearl-Harbor-Hawaii-viewed-from-the-USS-Chandeleur-(AV-10)-22nd-Mar-1944-80-GK-6979.jpg) |
-leaving-Pearl-Harbor-Hawaii-viewed-from-the-USS-Chandeleur-(AV-10)-22nd-Mar-1944-NARA-01.jpg) |
-leaving-Pearl-Harbor-Hawaii-viewed-from-the-USS-Chandeleur-(AV-10)-22nd-Mar-1944-NARA-02.jpg) |
-off-San-Francisco-California-circa-1945-NH-77365.jpg) |
-operating-near-Okinawa-27th-March-1945-80-G-K-14466.jpg) |
-photographed-29th-May-1944-80-G-242589.jpg) |
-pilots-being-briefed-during-operations-in-the-China-Sea-mid-January-1945-80-G-469275.jpg) |
-pilots-study-the-target-area-prior-to-strikes-on-Hong-Kong-on-16th-Jan-1945-80-G-469297.jpg) |
-pilots-VF-11-being-briefed-during-operations-in-the-China-Sea-mid-January-1945-80-G-469275.jpg) |
-planes-attacking-Japanese-shipping-in-the-port-of-Manila-Luzon-on-21st-Sep-1944-80-G-342915.jpg) |
-scoreboard-located-in-the-hangar-deck-displaying-the-ship's-WWII-battle-record-Wiki-01.jpg) |
-showing-damage-received-in-a-typhoon-on-5th-June-1945-80-G-700122.jpg) |
-showing-her-port-side-camouflage-pattern-at-anchored-in-Majuro-Harbor-29th-May-1944-NARA-01.jpg) |
-showing-her-starboard-side-camouflage-pattern-at-anchored-in-Majuro-Harbor-29th-May-1944-NARA-01.jpg) |
-showing-her-starboard-side-enroute-to-Palau-Island-with-Task-Group-38.1-5th-Sep-1944-NARA-01.jpg) |
-Task-force-58-raids-in-The-Caroline's-with-USS-Cabot-and-USS-Enterprise-July-1944-80-G-367247.jpg) |
-with-Grumman-F6F-5-Hellcats-from-VF-17-Jolly-Rogers-on-deck-in-April-1945-80-G-469299.jpg) |
-with-other-carriers-during-a-western-Pacific-gunnery-practice-12th-June-1945-80-G-K-5705.jpg) |
-with-other-carriers-during-a-western-Pacific-gunnery-practice-June-1945-80-G-K-5702.jpg) |
-at-anchor-when-assigned-to-Air-Task-Group-4-(ATG-4)-in-the-Western-Pacific-from-6th-Jan-to-2nd-July-1958.jpg) |
-En-route-to-Guantanamo-Bay-Cuba-10th-Jan-1954-80-G-K-17108.jpg) |
-assigned-Carrier-Anti-Submarine-Air-Group-59-(CVSG-59)-in-the-Pacific-Ocean-circa-in-Dec-1968.jpg) |
-assigned-Carrier-Anti-Submarine-Air-Group-59-(CVSG-59)-in-the-Pacific-Ocean-circa-in-July-1969.jpg) |
-bridge-when-in-Puget-Sound-Naval-Shipyard-1992-Wiki-01.jpg) |
-operating-off-the-coast-of-North-Vietnam-5th-Sep-1967-NH-97469.jpg) |
-underway-on-9th-Aug-1968-shortly-before-her-final-Seventh-Fleet-deployment-on-30th-Sep-1968.jpg) |
-was-deployed-to-the-Western-Pacific-from-17th-May-to-18th-Dec-1960.jpg) |
-is-hit-by-a-Japanese-kamikaze-off-Lingayen-Gulf-Philippines-5th-Jan-1945-80-G-342378.jpg) |
-is-hit-by-a-Japanese-kamikaze-off-Lingayen-Gulf-Philippines-5th-Jan-1945-80-G-342379.jpg) |
 |
 |
 |
United States Navy aircraft carrier USS Hornet II CV-12
-photographed-29th-May-1944-80-G-242589.jpg) |
-assigned-Carrier-Anti-Submarine-Air-Group-59-(CVSG-59)-in-the-Pacific-Ocean-circa-in-July-1969.jpg) |
USS Hornet II (CV-12)
Name: Hornet[1]
Namesake: Hornet
Ordered: 20 May 1940
Awarded: 9 September 1940
Builder: Newport News Shipbuilding
Laid down: 3 August 1942
Launched: 30 August 1943
Commissioned: 29 November 1943
Decommissioned: 15 January 1947
Renamed: From Kearsarge, October 1942
Identification: Hull number: CV-12
Recommissioned: 11 September 1953
Decommissioned: 26 June 1970
Reclassified: CVA-12, 1 October 1952; CVS-12, 27 June 1958
Stricken: 25 July 1989
Honors and awards: See Awards
Status: Museum ship at the USS Hornet Museum in Alameda, CaliforniaGeneral characteristics (as built)
Class and type: Essex-class aircraft carrier
Displacement: 27,100 long tons (27,500 t) (standard), 36,380 long tons (36,960 t) (full load)
Length: 820 feet (249.9 m) (wl), 872 feet (265.8 m) (o/a)
Beam: 93 ft (28.3 m)
Draft: 34 ft 2 in (10.41 m)
Installed power: 8 × Babcock & Wilcox boilers, 150,000 shp (110,000 kW)
Propulsion: 4 × geared steam turbines, 4 × screw propellers
Speed: 33 knots (61 km/h; 38 mph)
Range: 14,100 nmi (26,100 km; 16,200 mi) at 20 knots (37 km/h; 23 mph)
Complement: 2,600 officers and enlisted men
Armament: 12 × 5 in (127 mm) DP guns, 32 × 40 mm (1.6 in) AA guns, 46 × 20 mm (0.8 in) AA guns
Armor: Waterline belt: 2.5–4 in (64–102 mm), Deck: 1.5 in (38 mm), Hangar deck: 2.5 in (64 mm), Bulkheads: 4 in (102 mm)
Aircraft carried: 36 × Grumman F4F Wildcat, 36 × Douglas SBD Dauntless, 18 × Grumman TBF Avenger
USS Hornet (CV/CVA/CVS-12) is an Essex-class aircraft carrier built for the United States Navy (USN) during World War II. Completed in late 1943, the ship was assigned to the Fast Carrier Task Force (variously designated as Task Force 38 or 58) in the Pacific Ocean, the navy's primary offensive force during the Pacific War.
In early 1944, she participated in attacks on Japanese installations in New Guinea, Palau and Truk among others. Hornet then took part in the Mariana and Palau Islands campaign and most of the subsidiary operations, most notably the Battle of the Philippine Sea in June that was nicknamed the 'Great Marianas Turkey Shoot' for the disproportionate losses inflicted upon the Japanese. The ship then participated in the Philippines Campaign in late 1944, and the Volcano and Ryukyu Islands campaign in the first half of 1945. She was badly damaged by a typhoon in June and had to return to the United States for repairs.
After the war she took part in Operation Magic Carpet, returning troops to the U.S. and was then placed in reserve in 1946. Hornet was reactivated during the Korean War of 1950–1953, but spent the rest of the war being modernized to allow her to operate jet-propelled aircraft. The ship was modernized again in the late 1950s for service as an anti-submarine carrier. She played a minor role in the Vietnam War during the 1960s and in the Apollo program, recovering the Apollo 11 and Apollo 12 astronauts when they returned from the Moon.
Hornet was decommissioned in 1970. She was eventually designated as both a National Historic Landmark and a California Historical Landmark, and she opened to the public as the USS Hornet Museum in Alameda, California, in 1998.
Description and construction
The Essex-class ships were much larger than the preceding Yorktown-class aircraft carriers, which allowed them to carry more aircraft, armor, and armament.[2] The initial ships had a length of 872 feet (265.8 m) overall and 820 feet (249.9 m) at the waterline, although this was revised to an overall length of 888 feet (270.7 m) in the 'long-hull' sub-class when the bow was reshaped to accommodate a pair of quadruple 40-millimeter (1.6 in) mounts in the bow compared to the single mount in the earlier 'short-hull' ships like Hornet.
All of the ships had a beam of 93 feet (28.3 m) at the waterline and a draft of 30 feet 10 inches (9.4 m) at deep load.[3] They displaced 27,100 long tons (27,535 t) at standard load and 36,380 long tons (36,960 t) at deep load. Their designed complement was approximately 268 officers and 2,362 enlisted men, but more men were added even before the ships were completed; the addition of more light weapons and other equipment greatly increased the overcrowding so that Hornet's sister Intrepid had a crew of 382 officers and 3,003 enlisted men in 1945.[4] The ships had four geared steam turbines, each driving one shaft, using steam supplied by eight Babcock & Wilcox boilers. The turbines were designed to produce a total of 150,000 shaft horsepower (110,000 kW), enough to give a maximum speed of 33 knots (61 km/h; 38 mph). The ships carried enough fuel oil to give them a range of 14,100 nautical miles (26,100 km; 16,200 mi) at 20 knots (37 km/h; 23 mph).[5]
Launching ceremony of Hornet 30th August 1943
1. Christening of USS Hornet (CV-12) with Secretary of the Navy Frank Knox and Annie Reid Knox Virginia 30th Aug 1943
2. USS Hornet (CV-12) being prepared for her lunch at the Newport News Virginia 28th Aug 1943
3. Launching ceremony of USS Hornet (CV-12) at the Newport News Virginia 30th Aug 1943
4. Launching ceremony preparations of USS Hornet (CV-12) at the Newport News Virginia 30th Aug 1943Launching ceremony of Hornet, 30 August 1943
The Chief of Naval Operations had ordered three Essex-class carriers on 10 May 1940 in anticipation of Congress passing the Two-Ocean Navy Act,[15] although the ship that later became Hornet originally had the name Kearsarge with the hull number of CV-12. The contract to build her was awarded to Newport News Shipbuilding on 9 September 1940, and her keel was laid down on 3 August 1942. The seventh Hornet (CV-8) was sunk in the Battle of Santa Cruz on 26 October 1942, and the CV-12 hull was renamed Hornet shortly afterwards.[16] The ship was launched on 30 August 1943 with her sponsor being Annie Reid Knox, wife of Secretary of the Navy Frank Knox. She was commissioned on 29 November 1943 with Captain Miles R. Browning in command.[1]
Flight deck arrangements
Grumman F6F-3 Hellcat fighter of VF-15 being catapulted from Hornet via the hangar catapult 25th Feb 1944
The short-hull Essexes had a flight deck that was 862 feet (262.7 m) long and had a maximum width of 108 feet (32.9 m). Below it was a 654 by 70 feet (199.3 m × 21.3 m) hangar with a height of 18 feet (5.5 m). The hangar was connected to the flight deck by three aircraft elevators, two in the flight deck and a folding one on the port side of the flight deck, abreast the island.[6] Catapult arrangements for the early Essexs varied between ships; Hornet was built with a single hydraulic catapult on the forward part of the flight deck and another was fitted transversely on the hangar deck.[2] All of the Essexs were fitted with arresting gear to allow them to land aircraft over both the stern and the bow.[7]
Early in the design process, the Essexs were intended to carry over 100 aircraft: 27 fighters, 37 scout or dive bombers, 18 torpedo bombers, three observation and two utility aircraft, plus 21 partially disassembled spares. Early war experience increased the number of fighters to 36 at the expense of the observation and utility aircraft and reduced the number of spares to nine. By mid-1945, the air group typically consisted of 36 or 37 fighters, an equal number of fighter bombers, and dive and torpedo squadrons of 15 aircraft apiece for a total of 103. By this time, the fighter squadrons included specialist photo-reconnaissance and night fighter aircraft.[8]
Propulsion
The USS Hornet (CV-12), an Essex-class aircraft carrier, was powered by a steam turbine propulsion system.
This system consisted of 8 Babcock & Wilcox boilers, which generated steam. These boilers were designed to burn fuel oil and produce the high-pressure steam needed to drive the turbines. The steam produced by these boilers was essential for powering the carrier's propulsion system, as well as generating electricity for the ship’s operations. The steam turbines were connected to 4 propellers through geared reduction turbines. Each turbine drove one of the ship's four propellers, allowing it to move through the water at high speeds. The geared turbines allowed for efficient conversion of steam energy into mechanical energy to turn the propellers. The 4 geared steam turbines were capable of producing a combined total of 150,000 shaft horsepower (shp), which is a measure of the total power output used to propel the ship.
With this system, the USS Hornet (CV-12) could achieve a maximum speed of 33 knots (about 61 km/h or 38 mph), making it one of the faster aircraft carriers of its time. The turbines were designed to be highly reliable and efficient, ensuring that the ship could maintain high speeds for extended periods, which was crucial during combat operations and quick movements across the Pacific during World War II.
The Hornet's propulsion system also played a critical role in its ability to perform its primary mission as an aircraft carrier-launching and recovering aircraft at sea-by maintaining a steady speed and maneuverability during flight operations.
USS Hornet (CV-12) Armament
1 - 4. USS Hornet (CV-12) 20mm gun crews standing by as her planes hit Tokyo Japan 16th Feb 1945.
5 - 6. USS Hornet (CV-12) firing her starboard 5 inch gun battery during practise with USS Bon Homme Richard (CV-31) Pacific Jun 1945.Armament
The main armament of the Essex-class ships consisted of a dozen 38-caliber 5-inch (127 mm) dual-purpose guns arranged in two superfiring pairs of twin-gun turrets fore and aft of the island and four guns in single mounts on the port side of the flight deck. These guns were controlled by a pair of Mk 37 directors, mounted on the top of the island; each director was fitted with a Mk 4 fire-control radar. The early short-hull Essexs were equipped with eight quadruple 40-millimeter (1.6 in) Bofors anti-aircraft (AA) guns; one mount each at the bow and stern, four atop the island and two on the port side of the flight deck, next to the 5-inch guns. Each mount was controlled by its own Mk 51 director. The carriers were also fitted with 46 Oerlikon 20-millimeter (0.8 in) light AA guns on single mounts along the sides of the flight deck and on the island.[9]
Fire control and electronics
The Essex-class carriers were designed with little space reserved for radar and the additional systems added while under construction contributed to the general overcrowding of the crew and the cramped island of the ships. Hornet was completed with most of her radars mounted on the tripod mast atop her island. It carried the SK early-warning radar, SM height-finding radar and the SG surface search radar. A SC early-warning radar was positioned on a stub lattice mast on the starboard side of the funnel.[11]
Armor
The waterline armor belt of the carriers was 10 feet (3 m) high, 508 feet (155 m) long and covered the middle 62% of the hull. It was 4 inches (102 mm) thick, tapering to 2.5 inches (64 mm) at its bottom edge. The hangar deck was also 2.5 inches thick and the protective deck below it was 1.5 inches (38 mm) thick. Transverse 4-inch bulkheads closed off the ends of the belt armor to form the ship's armored citadel. The steering gear was protected by 2.5-inches of special treatment steel.[10]
The Hornet in dazzle camouflage
1. USS Hornet (CV-12) leaving Pearl Harbor Hawaii viewed from the USS Chandeleur (AV 10) 22nd Mar 1944
2. USS Hornet (CV-12) operating near Okinawa 27th March 1945
3. USS Hornet (CV-12) at sea during the Okinawa Operation seen from USS Belleau Wood 29th Mar 1945Wartime modifications
Changes to the numbers of 20 mm guns aboard Hornet during the war are not available in the sources, although she had 35 single mounts by the end of the war.[12] The ship did not return to any naval base in Hawaii or the West Coast until July 1945 when she arrived at San Francisco, California, for repairs for her typhoon damage, so it is unlikely that any major modifications were done before then. Facilities in Ulithi Atoll were limited, but they had been able to install some of the new equipment that was fielded in late 1944 and 1945. Some of the ship's Mk 51 directors may have been replaced by Mk 57 directors with an integral Mk 34 fire-control radar and the Mk 4 fire-control radar atop the Mk 37 directors may have been upgraded to a Mk 12 system that shared its mount with a Mk 22 height finder. The SP height finder was a lighter version of the SM and began to be installed in Essex-class ships in March 1945.[13]
While being repaired, the Navy took the opportunity to refit the ship to the latest standard. Her SK radar was upgraded to a SK-2 model with a dish antenna that improved its performance and her hangar-deck catapult was replaced by one on the flight deck. Her island was remodeled to expand the flag bridge which caused the removal of the forward lower 40 mm mount on the island and 10 new quadruple mounts were added along the sides of the flight deck and the hull for a total of 68 guns in 17 mounts.[14]
Hornet worked up off Bermuda before departing Norfolk, Virginia, on 14 February 1944 to join Task Force 58 at Majuro Atoll in the Marshall Islands where she arrived on 20 March 1944.[1] Two days later the Task Force departed to attack warships and airfields in the Palau Islands and the Kossol Roads to eliminate any threat to the scheduled operations in New Guinea and the Admiralty Islands. To block the exits from Kossol and trap all of the ships inside the lagoon, the torpedo bomber squadrons from Hornet and her sisters Lexington and Bunker Hill had trained on aerial minelaying. To avoid detection, the American ships steamed far south of the Japanese naval base at Truk. They were spotted on the 28th and Admiral Mineichi Koga, commander of the Combined Fleet, ordered his warships to withdraw to Tawi-Tawi Island in the Philippines and for the merchant shipping to disperse.[17]
As Task Force 58 approached its targets on the morning of 30 March, its carriers launched a fighter sweep that shot down 30 Mitsubishi A6M Zero fighters already airborne and they were soon followed by 39 Grumman TBF Avenger torpedo bombers, each of which carried a pair of magnetic mines that effectively bottled up the 40-odd ships in Kossol Roads.[18] This was the first and only time that carrier aircraft laid mines during the Pacific War.[19] Despite reinforcing fighters that flew in overnight, the Americans sank 24 merchant and auxiliary ships, totaling nearly 130,000 gross register tons (GRT) of shipping, plus two old destroyers, four subchasers and a pair of repair ships on 30 and 31 March. American pilots claimed to have shot down 63 aircraft and destroyed over 100 more on the ground while losing 25 aircraft of their own. On their way back to Majuro, the carriers attacked targets on Woleai on 1 April to little effect.[20]
Before Task Force 58 departed Majuro on 13 April, Rear Admiral Joseph J. Clark had hoisted his flag in Hornet as commander of Task Group 58.1 that consisted of his flagship and the three Independence-class light carriers, Cowpens, Belleau Wood and Bataan. The task group was ordered to attack Sarmi, Sawar, and Wakde Airfields in Western New Guinea while the other task groups supported the amphibious landings at Hollandia. There was little Japanese air activity while the ships were off New Guinea, although the Task Group's fighters did shoot down two Mitsubishi G4M (Allied reporting name 'Betty') bombers that were searching for them. Task Force 58 withdrew to Seeadler Harbor on Manus Island on 25 April to replenish for a few days before leaving to attack the shore facilities at Truk. The Japanese spotted the ships during the night of 28/29 April, but their weak attack later that morning was ineffective and the 84 Grumman F6F Hellcats of the morning fighter sweep were opposed by about 60 Zeros. Bad weather and a heavy overcast prevented the Americans from gaining complete air superiority until the mid-afternoon, but they were able to severely damage the naval base's infrastructure over the next two days. They lost 9 aircraft in accidents and 27 in combat, mostly to anti-aircraft fire while claiming 59 aircraft in the air and 34 on the ground.
En route to Majuro, Task Group 58.1 was detached to cover the bombardments of the airfields at Satawan and Ponape by the portions of the Task Force's escorting ships. Both islands had already been previously attacked and little additional damage appears to have been done in exchange for the loss of one aircraft shot down by AA guns. Task Force 58 arrived at Majuro on 4 May and spent the next month preparing for the Mariana and Palau Islands campaign.[21] The abrasive Browning had made many enemies and his mistakes led him to be relieved for cause[22] on 29 May; he was replaced by Captain William Sample.[23]
Mariana and Palau Islands campaign
Mariana and Palau Islands campaign
1. Grumman TBF 1C Avenger VT 2 White 82 and 95 prior to landing USS Hornet (CV-12)
2. Grumman TBF 1C Avenger VT 2 White 95 pictured on the flight deck of USS Hornet (CV-12)
3. USS Hornet (CV-12) damaged TBF Avenger lands damaged after strikes on the Marianas area 13th June 1944By June Hornet's air group (Carrier Air Group 2 (CVG-2)) mustered 40 Hellcat fighters, including 4 night-fighter versions, 33 Curtiss SB2C Helldiver dive bombers and 20 Avengers. Task Group 58.1 had exchanged Cowpens for Hornet's sister Yorktown so it mustered a pair each of fleet and light carriers for the campaign. Task Force 58 departed Majuro on 6 June in time to begin the air strikes on the southern Marianas six days later, three days prior to the planned amphibious assault on Saipan, although the Japanese discovered that it had left Majuro on 8 June. Hornet's night fighters began shooting down Japanese reconnaissance aircraft on the night of 10 June. Vice Admiral Marc Mitscher, commander of the task force, decided to move the air strikes forward to 11 June, hoping to catch the Japanese off guard.
The task group's fighters discovered 30 Zeros over Guam during their sweep and claimed to have shot them all down, with Hornet's 16 Hellcats claiming 23 of them as kills. A picket line of destroyers was stationed between the carriers and Guam and they controlled interceptions by the task group's fighters of about a dozen reconnaissance and attack aircraft that afternoon. The following days the task group continued to attack Guam to eliminate all of the aircraft based there as well as any reinforcements. Later that afternoon, Hornet's aircraft discovered a seven-ship reinforcement convoy east of Guam, but it was too far away to attack if the aircraft were to land during daylight. That night the task group closed the distance while the convoy continued to approach Guam and was only 80 nmi (150 km; 92 mi) when it launched 20 bomb-armed Hellcats. Their pilots were not trained for anti-shipping missions and failed to significantly damage the ships of the convoy before it reached Guam.[24]
The new commander of the Combined Fleet, Admiral Soemu Toyoda, was uncertain if the Americans were merely attacking the Japanese facilities in the Marianas until the fast battleships escorting Task Force 58 were detached to make a preliminary bombardment of Saipan on 13 June. Even before he received the report of the bombardment, he ordered the 1st Mobile Fleet to move forward to Guimaras Island to start training their inexperienced aviators in a more protected environment. He then alerted all forces to prepare to implement Plan A-Go, effective on 19 June, once he had word of the bombardment. The plan was intended to inflict a decisive defeat on the USN and cause the American government to sue for peace after the collapse of public will to continue the war. An American submarine spotted the movement and alerted Vice Admiral Raymond Spruance, commander of the entire operation. Not knowing the Japanese intentions, he believed that the Japanese ships would not be able to attack before 17 June. To take advantage of this window of opportunity to destroy Japanese aerial reinforcements gathering in the Bonin Islands, Spruance ordered Task Groups 58.1 and 58.4 to rendezvous on the 14th, attack the airbases there the following day and return in time to concentrate for the battle that he expected on the 17th.[25]
On 15 June, fighters from the two task groups conducted fighter sweeps over Iwo Jima, Hahajima and Chichi Jima, claiming to have shot down 20 Zeros over Iwo Jima for the loss of two Hellcats. Clark stationed his nightfighters over Iwo Jima that night to prevent the Japanese from launching reconnaissance missions or air strikes before launching more air strikes on the 16th. The bulk of the reinforcements intended for A-Go were still in Japan at this time, but the American carriers claimed to have destroyed a total of 81 aircraft, including 40 in the air, for the loss of four aircraft in combat and seven others in crashes, before departing the area later that afternoon.[26]
Battle of the Philippine Sea June 1944
Throughout the day on 19 June 1944, TF 58 repelled Japanese air attacks and slaughtered their planes in what Navy pilots called the “Great Marianas Turkey Shoot.” While the formation steered southeasterly courses at 1036, pickets reported Japanese aircraft approaching bearing 265°, distance 53 miles. Nine minutes later Enterprise began launching all of her planes spotted on deck, and the bombers orbited to the eastward while the fighters intercepted the attackers. Some of the planes broke through the CAP and a bomber dived on Enterprise just before noon, but her guns shot it down. A minute after noon she splashed a torpedo plane off the starboard beam, and two minutes later another. F6F-3 Hellcats of VF-10 flying from Enterprise splashed a Judy, bearing 000°, 42 miles, at 1325. During the afternoon watch the ship’s SBD-5s of VB-10 and TBF-1Cs and TBM-1Cs of VT-10 dropped their loads on airfields on Guam and then returned to the carrier. Enterprise rounded out the battle during the 1st dog watch by launching nine Hellcats that hounded enemy planes as they attempted to land on airfields on Guam. Enterprise lost a single Hellcat that day but her planes claimed to splash 19 enemy aircraft. Albacore (SS-218) and Cavalla (SS-244) sank Taihō and Shōkaku in separate attacks, respectively, and Japanese suicide aircraft narrowly missed Bunker Hill and Wasp.
The following afternoon Mitscher launched an air attack at extreme range on the retreating Japanese ships, for which Enterprise contributed 12 Hellcats, 11 Dauntlesses, and five Avengers. The strike sank Hiyō and two fleet oilers, and damaged Zuikaku, Chiyōda, and Junyō. Despite the risk of submarine attacks, Mitscher ordered his ships to show their lights in order to guide the returning aircraft, thus saving lives when the planes consumed fuel. The night degenerated into chaos as pilots desperately sought carriers or ditched in the water, and an additional 25 planes from six carriers landed on board Enterprise. The ship lost a fighter shot down during the strike, and another Hellcat, a Dauntless, and four Avengers that ditched, though destroyers rescued all of the ditched crewmen. After the carriers recovered the last of the aircraft, the formation turned to westerly courses.
USS Enterprise (CV-6) underway 2nd Aug 1944
The Japanese lost 395 carrier planes and an estimated 50 land-based aircraft from Guam. The Americans lost 130 aircraft and 76 pilots and aircrewmen. Enterprise fighters swept the Pagan Islands for barges and attacked the airfield there on 26 June, and then returned closer to Saipan, from where she launched daily strikes against Guam (28 June–5 July). On 29 June the Navy standardized carrier air groups and CVG-10 became a medium carrier air group - though stayed CVG-10. The bloody fighting ashore continued but organized resistance ended on Saipan on 9 July, on 21 July the Americans landed on Guam, and three days later on Tinian. The grueling fighting for the Marianas established the islands as bases from which bombers could reach the Japanese home islands. In addition, the seizure of the islands protected the northern flank of the Allied line of advance from the Central Pacific to the Philippines, toward which the amphibious forces of the Southwest Pacific also thrust. Enterprise in the meantime returned to Eniwetok on 9 July, and from there returned to Hawaiian waters, where she completed an availability at Pearl Harbor Navy Yard (16 July–3 August), and then (5–11 August) worked up.
Despite liberating the Marianas, Allied planners believed that a base in the western Carolines would support the advance toward the Philippines and chose the Palau Islands. To divert attention from the projected landings on Peleliu in those islands, TG 38.4, Rear Adm. Ralph E. Davison and including Enterprise, set out from Pearl Harbor and returned to Eniwetok (16–24 August), and then raided the Volcano and Bonin Islands. Davison intended for the raids to neutralize Japanese installations in those islands as a diversion in advance of Allied landings in the Morotai, Palau, and Philippine areas. TF 58 became TF 38 on 27 August, and the next day Enterprise sailed for battle. While the other carriers of the task group struck at Iwo Jima, Enterprise launched fighter sweeps against Chichi Jima, and her planes flew CAP and photographic reconnaissance flights. Off Iwo Jima, Hellcats from Franklin (CV-13) sank auxiliary minesweeper No. 8 Toshi Maru near 25°00'N, 141°50'E, and merchant cargo ship Suruga Maru near 24°46'N, 141°19'E. American aircraft damaged landing ship T-105 off Chichi Jima and aircraft from Enterprise twice damaged fast landing ship T-4 on (1–2 September). Cruisers and destroyers shelled the islands on the first two days of the month, and on 4 September Enterprise anchored off Saipan. Following wide-flung raids TF 38 attacked Japanese airfields and installations on Palau (6–8 September). An unopposed fighter sweep disclosed extensive damage inflicted by earlier raids. Meanwhile, Davison launched a fighter sweep over Yap, but flak shot down three Hellcats of VF-20 over the town of Yap. The task group continued to neutralize Palau, and Enterprise launched planes against Malakai Harbor in the Palaus, where Hellcats of VF-20 dropped napalm on warehouses (10–11 September).
Aircraft of TG 38.4 and four escort carriers of Carrier Unit One, Rear Adm. William D. Sample in command, then supported Operation Stalemate II - the landing of the 1st Marine Division on Peleliu. The Japanese had prepared their main line of resistance inland from the beaches to escape naval bombardment, and three days of preliminary carrier air attacks in combination with intense naval gunfire failed to suppress the tenacious defenders. Enterprise and the fleet carriers supported the initial landings, and Hellcats of VF-20 napalmed the Japanese (15–18 September). Carriers also supported landings on Angaur on 17 September. The Army’s 81st Infantry Division later reinforced the marines and the final Japanese surrendered on 1 February 1945.
After supporting the Battle of Peleliu Enterprise retired to Manus, and refueled and accomplished voyage repairs at that atoll (21–24 September). The task group returned to patrol west of the Palaus, ready to intercept any attempt by the Japanese Fleet to repeat the tactics used at Saipan (27 September–5 October). During the operations against the Palaus, Mitscher moved against the Philippines with strikes at airfields and shipping on and around Luzon, Mindanão, and in the Visayas. Planners designed these raids to divert the Japanese from the amphibious landings and to whittle down their strength in the Philippines, but the enemy offered only light opposition, which swayed the Allies to accelerate the speed of the advance by landing directly in the Philippines. In the first occasion since the Marianas campaign therefore, Mitscher led all four carrier task groups together as one command as they raided Japanese ships, airfields, and installations on Okinawa and the Ryūkyūs in preparation for the assault on Leyte (10–20 October).
Battle of Leyte Gulf Philippines October 1944
Enterprise, with CVG-20 embarked, rejoined the other ships of TF 38 on 7 October 1944, and shaped course to the northward. On 10 October the carriers launched 1,936 sorties. Enterprise launched her first raids against shipping around southern Okinawa. Intelligence reports indicated the likelihood of enemy submarines in a channel between Okinawa and Yagaji-shima, and her second strike included some TBM-1Cs of VT-20 carrying depth charges, but the Avengers failed to locate the submarines. The other Avengers dropped incendiary bombs that started fires in the capital of Naha. Hellcats of VF-20 claimed to destroy 15 planes on the ground and damaged another 27. In total the U.S. strikes sank Japanese submarine depot ship Jingei, landing ship T.158, minelayer Takashima, and auxiliary submarine chaser Cha 87 north-northwest of Okinawa. In or near Naha harbor, Navy carrier-based aircraft sank auxiliary minesweepers No. 6 Hakata Maru and Shimpo Maru, guardboats No. 5 Daisei Maru, No. 26 Nansatsu Maru, and Yuki Maru; motor torpedo boats Gyoraitei Nos 493, 496, 498, 500, 805, 806, 810, 812, 813, 814, and Gyoraitei No. 820; army cargo ship Horai Maru; merchant cargo ships Fukura Maru, Koryu Maru, Taikai Maru, and Tetsuzan Maru. Elsewhere in the vicinity, Navy planes sank auxiliary minesweeper No. 1 Takunan Maru off Okino Daito Jima, and army cargo ship Hirota Maru off Miyako Jima, and merchant cargo ship Nanyo Maru off Kume Jima. TF 38 aircraft damaged Coast Defense Ship No. 5 and submarine chaser Ch 58 off Okinawa; and guardboat No. 6 Daisei Maru, cargo ship Toyosaka Maru, and merchant cargo ship No. 7 Takashima Maru outside Koniya harbor. The next day the ship provided CAP while airplanes from other carriers flew 61 sorties against northern Luzon and damaged escort destroyer Yashiro off San Vicente and cargo vessel No. 6 Banei Maru off Aparri.
Mitscher hurled air strikes against Japanese ships, aerodromes, and industrial plants on Formosa, regarded as the strongest and best-developed base south of the homeland proper, and on northern Luzon (12–13 October). The enemy consequently fought vigorously, and an estimated 30 Zekes and Nakajima Ki-43 (Hayabusas) Oscars intercepted some of the American aircraft over southern Formosa, but Hellcats claimed to splash 18 without loss. Planes from Enterprise attacked an aircraft assembly plant at airfields at Ain Ansho and Okayama and ships in Takao harbor through “intense” flak. In particular, antiaircraft guns sited on “Ape Hill” at the northern end of the harbor, and along the spit of land that forms the western side of the harbor, led the survivors to recommend that future air strikes “assiduously” avoid Takao. The enemy gunners shot down an Avenger, killing Lt. (j.g.) Henry L. Murphy, ARM2c Ernest R. Costello, and AOM2c Francis X. Skeffington of VT-20. In addition, Japanese planes attacked the ships and Hellcats of VF-20 from Enterprise and VF-32 on board Langley (CVL-27) shot down two Bettys in separate duels during the 2nd dog watch on 13 October, and the CAP splashed six low flying Bettys and Frances’.
Two days later, Enterprise steamed to the east of Luzon and sent a fighter strike and sweep against Nielson Airfield to the north of Manila. Her airplanes tangled with enemy fighters of the 1st Air Fleet, Vice Adm. Teraoka Kinpei, but claimed to knock down 36 aircraft in the air and destroyed another seven on the ground. The ship followed those missions by refueling and receiving aircraft replacements on 16 October, and then (18–19 October) launching planes that bombed and strafed aircraft and installations at Clark and Nielson Fields, and Sanborn Field at Legaspi. About 30 Japanese fighters rose to intercept the attackers but VF-20 reported that the squadron “set the pace” by shooting down 12. As the strike returned to the carriers, however, the enemy attacked the ships, and Hellcats splashed 24 Japanese planes for the loss of two aircraft - and recovered one of the pilots. Despite what VF-20 reported as “stiff opposition” over Manila and Clark Field on 18 October, the squadron claimed to splash 27 enemy airplanes for the loss of a single Hellcat in dogfights, and furthermore destroyed 24 aircraft on the ground, probably knocked out 22 more, and damaged 44, though lost another two Hellcats to antiaircraft fire, but recovered one of the pilots. The VT-20 historian recalled 18 October as a “black day” for the squadron because a storm front compelled the aircraft to detour to the north to reach their target, and they consumed fuel in the process and four Avengers made water landings. Another slammed into a small carrier’s ramp while attempting to land, killing Lt. Charles W. Bretland, ARM1c Victor P. Kelimoff, and ACM2c Clay H. Riggs, and the other three airplanes landed on board different carriers, one of which, flown by Lt. (j.g.) Charles F. Schlegel, did so just as the Avenger ran out of fuel and switched to an empty tank. Enterprise rescued all of the crewmen the following day except Ens. Donald M. Conaway, who disappeared during the disaster.
Gen. Douglas A. MacArthur, USA, Commander Southwest Pacific Area, intended to develop Leyte as an air and logistics base to support the liberation of the Philippines. The Army’s 6th Ranger Battalion attacked Japanese installations on Dinagat and Suluan Islands at the entrance to Leyte Gulf, capable of providing early warning of a U.S. offensive, on 17 October 1944. The Japanese had prepared four Shō-gō (Victory) plans to counterattack Allied moves including Shō-gō 1 countered operations against the Philippines. During the Rangers’ raids the Japanese garrison on Suluan transmitted an alert that prompted Adm. Toyoda Soemu, Commander in Chief Combined Fleet, to order Shō-gō 1, thus helping to bring about the Battle of Leyte Gulf. Enterprise meanwhile operated as part of Vice Adm. Kinkaid’s Seventh Fleet, and supported the Sixth Army, Gen. Walter Krueger, USA, and the X and XXIX Corps’ 1st Cavalry and 7th, 24th, and 96th Infantry Divisions, when they landed on Leyte on 20 October. Enterprise left the next day, however, and headed toward Ulithi as the task group had been out since 24 September and other ships covered the operations.
Most of the larger Japanese ships lay near Lingga Roads off Singapore or in Japanese waters, providing them the strategic flexibility to respond to the Shō-gō plans - and access their dwindling fuel reserves. MacArthur’s landings at Leyte compelled the Japanese to redeploy their forces. The Japanese charged Vice Adm. Fukudome Shigeru, Commander Second Air Fleet and Sixth Base Air Force, to provide air support for Shō-gō 1, but the ongoing U.S. strikes depleted his air strength. In addition, Japanese shortages of fuel constrained their operations and they dispersed their fleet into the Northern, Central, and Southern Forces, which converged separately on Leyte Gulf. Attrition had reduced the Northern Force’s 1st Mobile Force, led by Vice Adm. Ozawa, to a strike group consisting of Zuikaku, light carriers Chitose, Chiyōda, and Zuihō, and converted battleship-carriers Hyūga and Ise. These carriers embarked only 108 planes -- Hyūga and Ise deployed their surviving aircraft ashore -- and operated as decoys to lure the U.S. carriers from the transports to enable Vice Adm. Kurita Takeo’s Central Force to savage the auxiliaries.
Dace (SS-247) and Darter (SS-227) reported Kurita’s approach in Palawan Passage on 23 October 1944, and Darter attacked two heavy cruisers and sank Atago and damaged Takao, and Dace torpedoed and sank heavy cruiser Maya, Kurita’s flagship. Kurita transferred his flag to Musashi and the Japanese ships continued, but on 24 October a plane from Intrepid discovered the enemy and Enterprise, Franklin, Intrepid, and Cabot began hurling aircraft at them as they crossed the Sibuyan Sea. The Japanese fought back furiously, and VT-20 reported that their bombers flew through “intense” antiaircraft fire. Musashi fired sanshikidan -- “Beehive rounds” -- from her powerful 18-inch guns, and as Lt. James S. Cooper, USNR, led Curtiss SB2C-3 Helldivers of VB-20, the squadron estimated that the battleship opened fire from a range of about ten miles and as they approached from an altitude of 12,000 feet. The “accurate” rounds burst within 500 feet above and below the planes, in a “spectacular” array of red, yellow, blue, purple, and white detonations. “The entire display,” Cmdr. Daniel F. Smith Jr., Commander CVG-20, reported, “was one to excite the admiration of any observer who did not happen to be the target, in which case it was likely to cause grave concern over the chances of going in and out.”
Waves of attackers nonetheless swarmed the Japanese ships and during the afternoon watch a group of nine Helldivers flying from Enterprise dropped four 1,000 pound armor piercing bombs into the battleship, some of which strafed the ship as they pulled out. Lt. Cmdr. Joseph T. Lawler led some Hellcats of VF-20 that also strafed the behemoth and at times fired rockets, and Enterprise launched another strike group of eight Avengers of VT-20 led by Lt. Cmdr. Samuel L. Prickett Jr., that each claimed to hit the ship with their torpedoes. In all, as many as 19 torpedoes and 17 bombs slammed into Musashi before she sank at 1936. The air group did not see the battleship sink, but Smith orbited in the area for some time after the attack aircraft departed, and observed that Musashi lay dead in the water, smoking, and “so far down by the bow that the forecastle was practically at the water’s edge.” Halsey notified the Third Fleet at midnight on 29 October: “Musashi not seen since 24th and believed sunk.” Planes from the three task groups also damaged battleships Yamato and Nagato, Tone, and destroyers Fujinami, Kiyoshimo, and Uranami. Smith reported that the air group attacked with “reckless courage”, and added that the enemy flak proved “most disconcerting” and fired at “extreme ranges”. A destroyer shot down Cmdr. Frederick E. Bakutis, VF-20’s commanding officer, but he was rescued seven days later. As the Helldivers returned to Enterprise they flew over a village on the eastern shore of Legaspi Peninsula and people waved at the airplanes as they eagerly awaited liberation. These strikes appeared to repel Kurita’s thrust. Carriers also launched planes against the Southern Force, Vice Adm. Nishimura Shoji in command, and its attached Force C, Vice Adm. Shima Kiyohide, as their ships proceeded through the Sulu Sea, sinking destroyer Wakaba and damaging battleships Fusō and Yamashiro.
Ozawa’s Northern Force meanwhile threatened the Americans, and Halsey ordered Mitscher to proceed with TF 38 northward to be in position to strike Ozawa the following morning. Mitscher operated primarily with: Alabama (BB-60), Iowa (BB-61), Massachusetts (BB-59), New Jersey, South Dakota, and Washington (BB-56); Enterprise, Essex, Franklin, Intrepid, and Lexington; Belleau Wood, Cabot, Independence, Langley, and San Jacinto; New Orleans (CA-32) and Wichita; Biloxi (CL-80), Miami (CL-89), Mobile (CL-63), Reno (CL-96), Santa Fe (CL-60), and Vincennes (CL-91); and 41 destroyers.
Carrier planes aggressively tore into the Japanese ships during the ensuing Battle of Cape Engaño. The Japanese attempted to veil at least one of their carriers by laying a barrage of phosphorus over her, which the Americans likened to thick cumulous clouds, and a carrier flew what Smith described as the “largest” battle flag he had ever seen, “perhaps 50 feet square.” Aircraft from Essex and Lexington sank Zuikaku about 220 nautical miles east-northeast of Cape Engaño, 19°20'N, 125°51'E, and Chitose 235 nautical miles east of the cape, 19°20'N, 125°20'E. Strikes from Franklin, Lexington, and Langley damaged Chiyoda, and New Orleans, Wichita, Mobile (CL-63), and Santa Fe finished her off 260 nautical miles southeast of Cape Engaño, 18°37'N, 126°45'E. Aircraft flying from Enterprise, Essex, Franklin, Lexington, and San Jacinto sank Zuihō east-northeast of Cape Engaño, 19°20'N, 125°51'E. The attacks threw the enemy formation into disarray, and VB-20 reported that the Japanese ships became a “disorganized mob”.
Enterprise launched two strikes, the first at 0630 and the second, consisting of ten Helldivers, five Avengers, and six Hellcats, at noon. The second strike rendezvoused with planes from the other carriers, and the combined group numbered about 30 Hellcats, 25 Helldivers, and 27 Avengers. Antiaircraft fire badly damaged an Avenger piloted by Lt. Francis J. Savage of VT-20 during one of the raids, and as he attempted to return to Enterprise a Zeke suddenly made a pass at the bomber but then broke off the attack and the Avenger successfully recovered on board. That squadron preferred to make coordinated torpedo attacks because they appeared to be more successful, but experienced repeated instances of torpedoes running wild, sinking, or exploding on contact with the water. They achieved considerable success, however, by each Avenger dropping up to four 500-pound bombs “in train” across a targeted ship, and preferred using semi armor-piercing in lieu of general purpose bombs because they penetrated further before detonating below decks. Two Helldivers ran low on fuel during the first raid and landed on board Franklin because she steamed closer, operated from that ship during the following strike, and returned to Enterprise before dark.
Japanese battleship Musashi in the Sibuyan Sea 24th Oct 1944
Japanese battleship Musashi under intense attack by Task Force 38 aircraft in the Sibuyan Sea 24th Oct 1944
The ship refueled on 26 October, and the following dawn reached a point to the north about 100 miles off San Bernadino Strait, and sent her planes against some of the enemy survivors. Japanese destroyer Shiranui fought with Nishimura, came about and made landfall at Coron off northern Palawan. She then stood out to search for light cruiser Kinu and destroyer Uranami, which aircraft from Manila Bay (CVE-61), Marcus Island (CVE-77), Natoma Bay (CVE-62), and Petrof Bay (CVE-80) sank on 26 October approximately 44 miles southwest of Masbate, near 11°46'N, 123°11'E, and about 12 miles southeast of that island, near 11°50'N, 123°00'E, respectively. American airplanes damaged Japanese destroyer Hayashimo during the fighting off Samar on 25 October, and she withdrew in company with Akishimo, until that destroyer detached to rejoin their fleet. Hayashimo continued toward Coron but planes from Enterprise discovered her about 40 miles south of Mindoro. A TBM-1C Avenger of VT-20 dropped a torpedo that blew off the ship’s bow, and she grounded and sank in the shallows off Semirara Island, near 12°05'N, 121°50'E. Shiranui rescued some of the survivors, but SB2C-3 Helldivers of VB-20 from Enterprise pounced on the ship and sank her about 80 miles north of Panay, near 12°0'N, 122°30'E. Other planes attacked Hayashimo during the ensuing days and her remaining crew despairingly ceased their attempts to salvage the wreck and abandoned ship on 12 November. The Battle of Leyte Gulf effectively finished the Japanese surface fleet.
Japanese resistance, reinforcements of enemy aircraft staged through Luzon, and torrential monsoon rains that turned the ground into a muddy quagmire and washed out bridges, delayed constructing airfields on Leyte. The enemy consequently contested the skies and the advance slowed to a crawl, impeding MacArthur’s plans to develop Leyte as a base. Halsey received orders to deploy the Third Fleet to ease the pressure on MacArthur’s troops by striking Japanese planes and aircraft installations. On 28 October Davison deployed his four carriers -- Enterprise, Franklin, Belleau Wood, and San Jacinto -- augmented by Hancock (CV-19), Intrepid, Cabot, and Independence of TG 38.2, Rear Adm. Gerald F. Bogan -- off Leyte and began launching raids to support the troops ashore. Enterprise patrolled east of Samar and Leyte until the end of October, launching strikes and searching for survivors of enemy attacks. Japanese attack aircraft and kamikaze suicide planes lashed the ships steaming offshore. At least 44 aircraft flew against TG 38.4 on 28 October, and the CAP and ships claimed to splash 13 of the attackers for the loss of four of their own fighters. During another series of attacks on 30 October, a Zeke (Zero), although on fire from repeated hits, dived on Enterprise from the starboard beam, crossed the after flight deck, narrowly missed parked planes, and fell into the sea on the port quarter. The next day Enterprise retired with the task group to Ulithi for supplies.
Enterprise spent only three days at Ulithi and sailed with TG 38.4 on 5 November. On 11 November she launched a successful strike on a Japanese convoy as the enemy attempted to land troops during the fourth phase of their Ta Operation in Ormoc Bay, on the west side of Leyte, near 10°50'N, 124°35'E. The Avenger crews of VT-20 reported that they “annihilated” the convoy; and VB-20 observed that one of the destroyers capsized and sank; another “continued on varying courses eastward and finally blew up and sank”; a bomb blew the bow off a “smaller DD” (likely minesweeper W. 30); and they saw a cargo ship “blow up and disintegrate”. The planes sank destroyers Hamanami, Naganami, Shimakaze, and Wakatsuki; W. 30; army cargo ships Mikasa Maru, Seiho Maru, and Tensho Maru; and merchant cargo ship Taizan Maru (ex-St. Quentin). They shifted their strikes to the Manila area and central Luzon and sank light cruiser Kiso, destroyers Akebono, Akishimo, Hatsuharu, and Okinami, and 20 merchant and auxiliary ships (13–14 November). After patrolling and fueling near Palau, the task group returned on 19 November to attack Clark Field and Subic Bay. Six Avengers of VT-20 hunted an enemy patrol boat but she remarkably outmaneuvered them. Late that afternoon four Mitsubishi G4M1 Type 1 Bettys attacked the task group but four VF-20 Hellcats scrambled and splashed all of the intruders, though a Japanese top turret gunner shot down a Hellcat, killing Ens. Robert K. Nelson, USNR. Enterprise then retired eastward and dispatched aircraft against the airfields at Yap before anchoring in Ulithi on 22 November, where she transferred CVG-20 to Lexington and CVG-19 boarded for transportation to Oahu.
Five days later she departed for the Hawaiian Islands and moored at Pearl Harbor on 6 December. The ship completed an availability in drydock at the navy yard, where new four-bladed propellers were fitted in an effort to reduce vibration during high speed turns (18–22 December). The new propellers proved successful and the ship set out for the Philippines on Christmas Eve 1944. Enterprise carried on board CVGN-90, an air group especially trained in night carrier operations and consisting of F6F-5Es, F6F-5Ns, and F6F-5Ps of VFN-90 and TBM-3Ds of Night Torpedo Squadron (VTN) 90. She joined TG 38.5 and Independence -- which operated with CVGN-41, a group also trained to fight at night -- and six destroyers. The group had relatively little experience and encountered few opportunities to train en route, but reported that they went to sea “with high hopes and great expectations of big things to come from this pioneering adventure.”
Battle of the Philippine Sea
Map of the Battle of the Philippine Sea 19–20th June 1944
Vice Admiral Jisaburō Ozawa, commander of the 1st Mobile Fleet, ordered A-Go to begin on 16 April while he concentrated and refueled his forces east of the Philippines. At nightfall on the 17th his ships were spotted by an American submarine some 900 nmi (1,700 km; 1,000 mi) west of Saipan, although Spruance did not receive its report until the early morning of 18 June. Japanese reconnaissance aircraft located Task Force 58 on that afternoon, but the shorter-ranged American aircraft failed to find the Japanese carriers. Ozawa decided to attack on the 19th rather than subject his inexperienced pilots to night landings that they had not trained for and turned south to keep the range from the Americans constant. Spruance had no idea where the Japanese were until a radio transmission from Ozawa was triangulated at a point 410 nmi (760 km; 470 mi) west of his task force on the night of the 18th. A radar-equipped Martin PBM Mariner patrol bomber discovered the 1st Mobile Fleet at 01:15 on 19 June, but its message was not received for another eight hours due to radio troubles. The early morning searches by the Americans were not successful, but the Japanese had been tracking them continuously since 01:00.[27]
That night the Americans had tracked reinforcements flying from Truk to Guam and Mitscher ordered fighters from Task Group 58.1 to patrol over Orote Field. Hellcats from Belleau Wood were the first to engage Japanese aircraft taking off at 07:00 and they had to be reinforced by fighters from Hornet and Yorktown. By 09:30 they had claimed to have shot down 45 fighters and 5 other aircraft while only losing a pair of Hellcats. At that time Hornet launched an air strike of 17 Helldivers and 7 Avengers, escorted by a dozen Hellcats, that bombed Orote without encountering Japanese aircraft. At 09:50 an incoming Japanese air strike had been picked up on radar and the carriers turned into the wind to begin launching 140 fighters; at 10:04, the fighters patrolling over Guam were summoned to reinforce the Combat Air Patrol (CAP) over Task Force 58, although they were too late to participate in the aerial battle. The CAP, reinforced by the newly launched Hellcats, intercepted the Japanese, shooting down 40 of the 57 Zeros involved and seriously disrupting the Japanese attack which only inflicted minor damage on one battleship.[28] Hornet contributed Hellcats who claimed to have shot down nine Zeros and three Nakajima B6N 'Jill' torpedo bombers.[29] The second wave of aircraft was detected at 11:07, but Hornet's fighters did not participate in their defeat. The third wave was given erroneous locations for the American ships and were 120 nmi (220 km; 140 mi) northwest of them at 12:40. Most of them turned back, but about a dozen did not and were detected by Task Group 58.1 at 12:56. They were intercepted by 17 Hellcats from Hornet and Yorktown which shot down six Zeros and a Jill, with Hornet's fighters claiming nine aircraft in exchange for a damaged Hellcat.[30] The fourth wave was also misdirected and most of the aircraft decided to continue onwards and land on Guam. They arrived there around 15:00 and were intercepted by 41 Hellcats from Hornet, her sister Essex, Cowpens and Enterprise. They shot down 40 of the 49 aircraft; two of Hornet's pilots shot down five Japanese aircraft as they were attempting to land.[31]
A group of 295 Hellcats, together with five Avengers and Dauntlesses, had engaged the Japanese during the day and they shot down 208 aircraft of the 373 flown off by the carriers. The Americans lost seven Hellcats at sea, nine over Guam and six by accidents; seven bombers had been shot down by AA guns over Guam and two others had crashed. All told they lost 31 aircraft to all causes during the day. The Japanese lost 35 aircraft in accidents and aboard the two carriers sunk by submarines during the battle, together with 18 Guam-based aircraft shot down and 52 destroyed on the ground for a grand total of 313 to all causes, an exchange ratio of almost exactly 10:1 in favor of the Americans. Not without cause did they nickname the battle 'The Marianas Turkey Shoot'.[32]
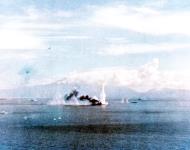
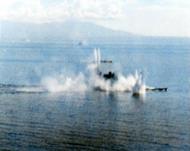
Japanese aircraft carrier Zuikaku (center top) and two destroyers maneuvering during the Battle of the Philippine Sea June 1944
Zuikaku (upper center) and a pair of destroyers under attack by Hornet's Helldivers, 20 June 1944
At dusk, the Japanese turned away to the northwest to regroup and to refuel and the Americans turned west to close the distance. They discovered the retiring Japanese fleet during the afternoon of the following day and Mitscher ordered an air strike launched even though it meant recovering the aircraft at night. It consisted of 54 Avengers and 51 Helldivers, escorted by 85 Hellcats. The Japanese carriers launched their remaining 68 Zeros of which all but three were shot down for the loss of 20 American aircraft to all causes. Hornet's aircraft badly damaged the carrier Zuikaku while the other aircraft sank the carrier Hiyō, two tankers and lightly damaged three other carriers and a few other ships. Clark ordered his task group to turn on their lights to guide his pilots home before Mitscher ordered the entire task force to do the same. Despite these precautions, six Hellcats, 35 Helldivers and 28 Avengers were lost in deck-landing accidents or ran out of fuel, although most of their crews were rescued that night or over the next few days.[33]
Follow-on attacks - After refuelling on 22 June, most of Task Force 58 sailed to Eniwetok in the Marshall Islands, but Clark took his task group north to attack the Bonins again to interdict any reinforcements for the Marianas. A reconnaissance aircraft spotted his ships on the morning of the 22nd and alerted the Japanese defenders. They scrambled about 60 Zeros and a few Yokosuka D4Y 'Judy' dive bombers to intercept the inbound 51 Hellcats. They shot down 6 Hellcats for the loss of 24 Zeros and 5 Judys. The Japanese had enough remaining aircraft to mount two attacks against the task group. The first airstrike of about 20 torpedo bombers had every aircraft shot down by fighters and anti-aircraft fire and the second of 23 Zeros, 9 Judys and 9 Jills never found the American ships. They were intercepted and the Hellcats shot down 10 Zeros and 7 Jills.[34]
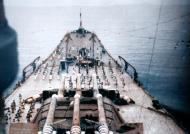
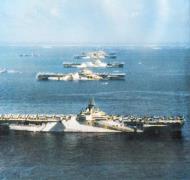
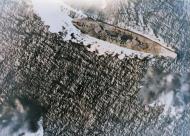
Task Group 58.1 reversing course during the attack on Yap, 28 July 1944. Hornet is in the center, with the light carrier Cabot in the left middle distance and Yorktown at right. Seven Hellcats are overhead.
The task group arrived at Eniwetok on 27 June and departed to attack the Bonins again three days later, now reinforced by Task Group 58.2. They attacked on 3–4 July; the surviving nine Zeros and eight torpedo bombers attempt to do equal damage to their enemy, but lost five Zeros and seven bombers without inflicting any damage on the ships. The task groups relieved Task Group 58.4, which had been supporting the fighting on Saipan, and remained there a week before returning to Eniwetok. In late July, Task Group 58.1 attacked Japanese bases in Yap and nearby islands before attacking the Bonins again on 4–5 August; it arrived back at Eniwetok on the 9th.[35]
That same day, Sample was relieved to take command of a carrier division and Captain Austin Doyle replaced him.[23] Unwilling to serve under Vice Admiral William Halsey, Clark hauled down his flag and was relieved by Vice Admiral John McCain on 18 August.[36] Clark remained aboard Hornet to assist McCain however he might and to serve as the reserve carrier-experienced admiral in case of need.[37] Eight days later, Halsey relieved Spruance and Task Force 58 was redesignated as Task Force 38.[38]
In a strategy conference in Pearl Harbor in July, President Franklin Roosevelt agreed with General Douglas MacArthur that the Philippines, an American territory, would be liberated and they set the date for 20 December. This required a series of preliminary operations to assault the Japanese bases in the western Caroline Islands and the approaches to the Philippines, including Yap and the Palaus. Mitscher began the process by taking three of his task groups, including Hornet's TG 38.1, to attack the Palaus on 6–8 September before moving further west to attack Mindanao on 9–10 September, the southernmost large island of the Philippines. Encouraged by the lack of opposition, Halsey ordered Mitscher to attack the central Philippine islands, including Leyte and the other Visayan Islands. Resistance was weak during the attacks on 12–13 September and the American pilots claimed 173 aircraft shot down, 305 destroyed on the ground and 59 ships sunk for the loss of 9 aircraft to all causes. The reality was slightly different, the First Air Fleet defending the central Philippines had a strength of 176 aircraft before the American attacks and 85 after them; the Imperial Japanese Army Air Force (IJAAF) lost 31–40 aircraft during the attacks.[39]
One of Hornet's Hellcats was shot down off Leyte on 10 September. The pilot was rescued by Filipino fishermen and he had been contacted by members of the Filipino Resistance and informed that there was no Japanese garrison on Leyte. Halsey, coupling this information with the weak resistance put up by the Japanese during his raids on the Philippines, believed that most of the preliminary attacks planned before invading Luzon on 20 December, could be skipped and suggested to the Joint Chiefs of Staff that the landing date be moved forward to 20 October. They agreed, although Admiral Chester Nimitz, commander of the Pacific Fleet, still required that he should conduct those parts of the plan regarding seizing bases in the Palaus and the Western Carolines.[40]
Halsey sent TG 38.1 south to attack Japanese airfields in the area during the invasion of Morotai that began on the 15th, but summoned them back to rejoin the bulk of TF 38 before his planned attack on Manila on 21 September. Hornet's aircraft participated in the second wave of attacks on Manila Bay and sank the elderly destroyer Satsuki. The American pilots claimed to have shot down 110 aircraft and destroyed 95 on the ground, although the First Air Fleet actually lost less than two dozen aircraft to all causes. TF38 claimed to have sunk or damaged seven oil tankers, but Japanese records show that nine were sunk or wrecked. Bad weather forced the cancellation of most of the airstrikes planned for the second day, but Halsey decided to attack Coron Bay in the Calamian Islands instead, an anchorage often used by Japanese oilers, on the other side of the Philippines with TGs 38.1 and 38.3. Hornet's air group led the combined airstrike which sank two oilers, six freighters, several escorts and the seaplane tender Akitsushima. TG 38.1 then sailed to Seeadler Harbor to replenish and exchange Air Group 2 for Air Group 11.[41] Clark finally departed Hornet on 1 October.[42]
Philippines campaign 18th October 1944
Japanese merchant ships SS Tsingtao Maru or Hoten Maru USS Intrepid (CV-11) raids off Luzon 18th Oct 1944
Japanese merchant ships SS Tsingtao Maru or Hoten Maru USS Intrepid (CV-11) raids off Luzon 18th Oct 1944
On October 18, 1944, USS Intrepid (CV-11) was part of the U.S. Navy’s Task Force 38 (TF 38), a formidable carrier strike force under Vice Admiral Marc A. Mitscher within the Third Fleet led by Admiral William “Bull” Halsey. This task force was engaged in air raids on Japanese forces in the Philippines, focusing particularly on Luzon to disrupt Japanese defenses and logistics in preparation for the Leyte invasion. Here’s a more detailed explanation of Task Force 38’s activities on this date, including the ships involved and the scope of the attack.
Task Force 38’s Structure and Composition
On October 18, 1944, Task Force 38 consisted of four primary task groups, each organized around powerful aircraft carriers escorted by battleships, cruisers, and destroyers. These task groups had overlapping roles, with a particular focus on achieving air superiority, disrupting Japanese reinforcements, and preparing for the imminent invasion of Leyte.
Task Group 38.1 (TG 38.1) - Commanded by Rear Admiral William K. Harrill:
Carriers: USS Wasp (CV-18), USS Hornet (CV-12) with Light Carriers: USS Monterey (CVL-26), USS Cowpens (CVL-25)
Battleships: USS Massachusetts (BB-59), USS Alabama (BB-60)
Cruisers and Destroyers: Various heavy cruisers (e.g., USS Boston (CA-69)) and destroyers.Task Group 38.2 (TG 38.2) - Commanded by Rear Admiral Gerald F. Bogan:
Carriers: USS Intrepid (CV-11), USS Franklin (CV-13), USS Bunker Hill (CV-17) with Light Carriers: USS Cabot (CVL-28), USS Independence (CVL-22)
Battleships: USS Iowa (BB-61), USS New Jersey (BB-62)
Cruisers and Destroyers: Heavy and light cruisers like USS Santa Fe (CL-60) and destroyers in support roles.Task Group 38.3 (TG 38.3) - Commanded by Rear Admiral Frederick Sherman:
Carriers: USS Essex (CV-9), USS Lexington (CV-16) with Light Carriers: USS Langley (CVL-27), USS Princeton (CVL-23)
Battleships: USS Washington (BB-56), USS South Dakota (BB-57)
Cruisers and Destroyers: A mix of heavy and light cruisers, such as USS Mobile (CL-63), and destroyers for air and anti-submarine defenses.Task Group 38.4 (TG 38.4) - Commanded by Rear Admiral Ralph E. Davison:
Carriers: USS Enterprise (CV-6), USS Saratoga (CV-3) with Light Carriers: USS Belleau Wood (CVL-24), USS San Jacinto (CVL-30)
Battleships: USS New Mexico (BB-40), USS Mississippi (BB-41)
Cruisers and Destroyers: Multiple heavy cruisers and destroyers.Operations on October 18, 1944
USS Intrepid (CV-11) was part of TG 38.2 and participated in a series of coordinated air strikes over Luzon, primarily focusing on Japanese airfields, installations, and logistical centers. This effort aimed to paralyze Japanese air operations and prevent Japanese forces from launching effective counterattacks against the American forces poised to land at Leyte.
Key Actions of USS Intrepid and TG 38.2
Strikes on Luzon: Intrepid’s aircraft, primarily Hellcat fighters, Dauntless dive bombers, and Avenger torpedo bombers, launched sorties targeting enemy airfields at Clark Field and Nichols Field on Luzon. These strikes aimed to destroy Japanese planes on the ground and disrupt air operations.
Anti-Shipping and Logistical Raids: Intrepid’s aircraft also conducted bombing raids against Japanese shipping vessels and supply depots, aiming to sever supply lines and weaken logistical support.
Air Defense Suppression: With Task Force 38 carrying out strikes across Luzon, Intrepid’s pilots faced anti-aircraft fire from Japanese positions, as the carrier-based aircraft worked to neutralize these defenses.
Other Task Groups' Activities on October 18
Additional Strikes on Formosa and Luzon: TG 38.3 and TG 38.4 conducted further attacks against targets in Formosa (Taiwan) and the northern Philippines. These attacks extended the overall reach of Task Force 38’s operation and maintained pressure on Japanese forces across a broader front.
Bombardment Support from Battleships: Battleships like USS Iowa and USS New Jersey provided naval gunfire support, ensuring that Japanese shore defenses faced continuous pressure. Submarine Protection: Destroyers and cruisers within each task group provided screening against Japanese submarines, which posed a persistent threat to the fleet. Importance of October 18, 1944, Operations
The October 18 strikes were vital in setting the stage for the invasion of Leyte. By targeting airfields, infrastructure, and Japanese naval resources, TF 38 reduced the Japanese capacity to mount air and sea-based counterattacks against the Allied invasion force. The damage to Japanese resources directly contributed to the success of the Leyte landing on October 20, 1944, and the eventual Battle of Leyte Gulf from October 23 to October 26, 1944, which was one of the largest and most decisive naval engagements of the war.

-underway-2nd-Aug-1944-19-LCM-CV6-71792.jpg)

-and-two-destroyers-maneuvering-Battle-of-the-Philippine-Sea-June-1944-80-G-238025.jpg)
-raids-off-Luzon-18th-Oct-1944-NH-95942.jpg)
-raids-off-Luzon-18th-Oct-1944-NH-95941.jpg)
-raids-off-Luzon-18th-Oct-1944-NH-95945.jpg)
-raids-off-Luzon-18th-Oct-1944-NH-95943.jpg)
-raids-off-Luzon-18th-Oct-1944-NH-95939.jpg)
-raids-off-Luzon-18th-Oct-1944-NH-95940.jpg)
-raids-off-Luzon-18th-Oct-1944-NH-95944.jpg)
-raids-off-Luzon-18th-Oct-1944-NH-95947.jpg)
The Sibuyan Sea raid on 24th October 1944
The Battle of the Sibuyan Sea on October 24, 1944, was a crucial engagement within the larger Battle of Leyte Gulf, which itself was a complex series of naval battles between Allied and Japanese forces from October 23 to October 26, 1944. This battle was pivotal in Japan’s last major attempt to disrupt the American landings on Leyte and aimed to repel the advancing U.S. forces in the Philippines.
The Sibuyan Sea raid on 24th October 1944
Series of photo's taken by by Richard Shipman, a photographer with the USS Intrepid while in the back seat of an SB2C Helldiver during the Sibuyan Sea raid 24th October 1944
Background
The Japanese plan, Operation Sho-Go 1, aimed to draw American forces away from the Leyte beachhead. It involved multiple Japanese fleets converging on Leyte Gulf from different directions:
Vice Admiral Takeo Kurita’s Center Force, the main Japanese fleet with the largest battleships (Yamato and Musashi), was to approach from the Sibuyan Sea.
Vice Admiral Jisaburō Ozawa’s Northern Force, a decoy carrier force, would draw the American Third Fleet northward.
Vice Admiral Shōji Nishimura’s Southern Force and Vice Admiral Kiyohide Shima’s forces would strike from the south through the Surigao Strait to converge with Kurita’s Center Force.
The Center Force was the most powerful, consisting of five battleships, including Yamato and Musashi (the largest battleships ever built), along with 12 cruisers and 15 destroyers.Course of the Battle
As Kurita’s Center Force moved through the Sibuyan Sea on October 24, American reconnaissance planes from Task Force 38 spotted the fleet. The U.S. response was swift, with waves of carrier-based air strikes launched primarily from USS Intrepid, USS Essex, USS Lexington, and USS Franklin.
Key Phases of the Battle:
Japanese battleship Musashi in the Sibuyan Sea 24th Oct 1944
Japanese battleship Musashi under intense attack by Task Force 38 aircraft in the Sibuyan Sea 24th Oct 1944
Air Strikes on Japanese battleship Musashi:
The Japanese battleship Musashi became the primary target due to its imposing size and power. It endured multiple waves of American torpedo and bomb attacks.
By the end of the day, the Japanese battleship Musashi had been struck by at least 17 bombs and 19 torpedoes in six separate waves of attacks.
Despite her advanced armor, the sheer volume of damage proved overwhelming, and Musashi eventually sank in the Sibuyan Sea, marking a significant blow to the Japanese fleet.
Air Strikes on Japanese battleships Musashi and Yamato in the Sibuyan Sea
1. IJN battleship Yamato and Musashi moored in Truk Lagoon sometime during 1943.
2 - 6. IJN battleship Yamato while retreating from the Sibuyan Sea came under attack on 26th Oct 1944Yamato and Other Ships:
While Yamato, the sister ship of Musashi, also took damage during the attacks, it survived. Other Japanese cruisers and destroyers were similarly damaged by air strikes, weakening the overall strength of Kurita’s force.
Despite the losses, Kurita continued to advance toward the Philippines but temporarily withdrew to regroup due to the intense air strikes. Temporary Withdrawal and Return of the Center Force:
Kurita briefly ordered a retreat following the loss of Musashi and damage to other vessels. However, upon receiving new orders, he resumed his course toward the San Bernardino Strait, intending to proceed toward Leyte Gulf as part of the Japanese coordinated attack plan.
Decoy Operation and Impact on American Forces:
While Kurita’s Center Force fought in the Sibuyan Sea, Ozawa’s Northern Force acted as a decoy to lure Admiral Halsey’s Third Fleet away from Leyte Gulf. The decoy worked: Halsey took his powerful carrier groups north to engage what he believed to be the main Japanese force. This decision temporarily left the Leyte beachhead vulnerable, allowing Kurita’s damaged but still formidable Center Force to pass through the San Bernardino Strait and threaten the U.S. landings in Leyte Gulf.
Significance of the Battle of the Sibuyan Sea
The Battle of the Sibuyan Sea was significant in several ways:
Tactical Loss for Japan: The sinking of Musashi and the damage inflicted on other ships represented a substantial tactical loss for Japan. The firepower of these battleships was crucial to Kurita’s fleet, and losing Musashi weakened the striking power of the Center Force.
Strategic Impact: Despite the damage, Kurita’s persistence and the success of Ozawa’s decoy operation allowed the Japanese fleet to advance further than expected. This set up the intense Battle off Samar on October 25, where Kurita’s force nearly overran a small group of U.S. escort carriers and destroyers in the famed “Taffy 3” action.
Failure of the Japanese Plan: Although the Japanese Center Force managed to reach the area, the battle marked the effective end of Japan’s major naval presence. Despite the audacious plan and the skill of individual Japanese commanders, the Allied superiority in aircraft carriers and air power, combined with increasingly effective submarine tactics, overwhelmed the Japanese fleet.
Legacy and Consequences
The Battle of the Sibuyan Sea and subsequent actions in the Battle of Leyte Gulf led to a catastrophic loss of Japanese naval power. The defeat crippled Japan’s ability to project force and defend its remaining holdings in the Pacific. From this point on, the Japanese Navy would no longer be able to mount large-scale operations, making Leyte Gulf the last of the major naval battles in the Pacific.
Ultimately, the battle underscored the strategic dominance of American carrier aviation and anti-aircraft capability and marked a turning point that left the Philippines and Southeast Asia increasingly exposed to Allied forces.
After Kurita's force began to withdraw, Halsey ordered TF 38 to steam north to intercept the aircraft carriers of the Northern Force, commanded by Vice Admiral Jisaburō Ozawa.[1] Bogan correctly perceived that Ozawa's force was intended to lure TF 38 away from the landing area to allow Kurita to attack it, but Halsey overruled him and several other Task Group commanders who voiced similar concerns.[8] Early on 25 October, aircraft from Intrepid and the other carriers launched a strike on the Japanese carriers. Aircraft from Intrepid scored hits on the carrier Zuihō and possibly the carrier Zuikaku. Further strikes throughout the morning resulted in the sinking of four Japanese aircraft carriers and a destroyer in the Battle off Cape Engaño.[1][9] Halsey's preoccupation with the Northern Force allowed Kurita the respite he needed to turn his force back to the east, push through the San Bernardino Strait, where it engaged the light forces of escort carriers, destroyers, and destroyer escorts that were directly covering the landing force in the Battle off Samar. Kurita nevertheless failed to break through the American formation, and ultimately broke off the attack.[1]
Background
The Japanese plan, Operation Sho-Go 1, aimed to draw American forces away from the Leyte beachhead. It involved multiple Japanese fleets converging on Leyte Gulf from different directions:
Vice Admiral Takeo Kurita’s Center Force, the main Japanese fleet with the largest battleships (Yamato and Musashi), was to approach from the Sibuyan Sea.
Vice Admiral Jisaburō Ozawa’s Northern Force, a decoy carrier force, would draw the American Third Fleet northward.
Vice Admiral Shōji Nishimura’s Southern Force and Vice Admiral Kiyohide Shima’s forces would strike from the south through the Surigao Strait to converge with Kurita’s Center Force.
The Center Force was the most powerful, consisting of five battleships, including Yamato and Musashi (the largest battleships ever built), along with 12 cruisers and 15 destroyers.After Kurita's force began to withdraw, Halsey ordered TF 38 to steam north to intercept the aircraft carriers of the Northern Force, commanded by Vice Admiral Jisaburō Ozawa.[1] Bogan correctly perceived that Ozawa's force was intended to lure TF 38 away from the landing area to allow Kurita to attack it, but Halsey overruled him and several other Task Group commanders who voiced similar concerns.[8] Early on 25 October, aircraft from Intrepid and the other carriers launched a strike on the Japanese carriers. Aircraft from Intrepid scored hits on the carrier Zuihō and possibly the carrier Zuikaku. Further strikes throughout the morning resulted in the sinking of four Japanese aircraft carriers and a destroyer in the Battle off Cape Engaño.[1][9] Halsey's preoccupation with the Northern Force allowed Kurita the respite he needed to turn his force back to the east, push through the San Bernardino Strait, where it engaged the light forces of escort carriers, destroyers, and destroyer escorts that were directly covering the landing force in the Battle off Samar. Kurita nevertheless failed to break through the American formation, and ultimately broke off the attack.[1]
Liberation of the Philippines - Philippines Campaign (1944–1945)
The four carrier groups of TF 38 rendezvoused west of the Marianas on 7 October, after weathering a typhoon that inflicted only minor damage. At this time, Hornet's Air Group 11 consisted of 39 Hellcats, 25 Helldivers and 18 Avengers. After refueling the following day, they proceeded north with the mission of destroying Japanese aircraft that could reinforce the defenses of the Philippines. Analysis of American radio traffic had alerted the Japanese and they were expecting an attack along the arc between the Ryukyu Islands and Formosa or in the northern Philippines. The Americans obliged with an attack on the Ryukyus on 10 October, claiming to have shot down over 100 aircraft while losing 21 of their own to all causes. This attack caused the Japanese to activate the Sho-1 and Sho-2 variants of their plan that provided for the defense of the Philippines and for the islands between the Philippines and Japan. As part of the plan, the carrier-based aircraft would operate from land bases.[43] After recovering their aircraft, TF 38 headed south that night to refuel east of Luzon the next day. In the early afternoon of 11 October, TG 38.1 and 38.4 launched an airstrike again the airfield in Aparri, on the northern coast of Luzon, which claimed to have destroyed 15 aircraft on the ground.[44]
Attack on Formosa
Curtiss SB2C 3 Helldivers over the USS Hornet (CV-12) after strikes on Japanese shipping China Sea Jan 1945
Before dawn, TF 38 launched a fighter sweep of 199 Hellcats against an alerted defense which already had fighters in the air. Despite this, Japanese losses were very heavy while the Americans lost 48 aircraft to all causes on 12 October. Throughout the night, the Japanese made multiple attacks, losing 42 aircraft to no effect. Another series of airstrikes followed on 13 October, although fewer defending aircraft made an appearance and TF 38's carriers lost 12 aircraft to all causes. At twilight, torpedo bombers attacked TG 38.1; Hornet evaded one torpedo that eventually crippled the heavy cruiser Canberra. Halsey had originally planned to withdraw that night to refuel on the 14th, but he had plenty of fuel left and decided to attack the airfields from which the Japanese might mount attacks on Canberra as she was towed westwards. Little opposition was encountered when the naval aviators flew their morning airstrike over Formosa and the carriers began to withdraw that afternoon, having lost 23 aircraft to all causes. TG 38.1 remained behind to protect the ships escorting Canberra. The Japanese repeated their twilight attacks against TG 38.1 and managed to cripple the light cruiser Houston with a torpedo, but both cruisers reached Ulithi about a week later. Admitted Japanese losses during the airstrikes and on the attacks on the fleet amounted to 492 aircraft, including 100 from the IJAAF.[45]
On 18 October TG 38.1 rendezvoused with TG 38.4 off the eastern coast of Luzon. Later that morning TG 38.1's aircraft attacked targets near Clark Air Base and San Bernardino Strait, losing seven aircraft to all causes. Pilots claimed to have shot down 30 aircraft and to have destroyed 29 more on the ground. The following day, the aviators were tasked to attack airfields near Clark Air Base and Manila and claimed to have destroyed 23 aircraft on the ground. After recovering their aircraft, both task groups headed south to where they could support the amphibious landings on Leyte scheduled for 20 October. Halsey ordered on 19 October that the air groups aboard the Essex-class carriers be reorganized with 54 fighters, 24 Helldivers and 18 Avengers, using locally available replacement aircraft beginning on 29 October.[46]
That morning TG 38.1 launched a fighter sweep over northern Mindanao; there was no evidence of Japanese aerial activity in the air or on the ground. One aircraft was reportedly destroyed at Del Monte Airfield and six others were damaged. Both task groups launched large airstrikes later that morning to attack the defenses of the landing beaches themselves and the area immediately behind them. Their effectiveness was inhibited by the dense foliage, heavy smoke in the air and the large number of aircraft involved over a relatively small area. Many aircraft had to wait almost two hours before receiving their targets for lack of sufficient communications channels. That evening the task groups departed the area to refuel the next morning, returning to the area by the morning of the 22nd, although the bad weather prevented most flying. That evening Halsey ordered TG 38.1 to proceed to Ulithi to prepare for the attacks on the Japanese mainland scheduled for 11 November. After receiving reports of Japanese surface ships in the Sibuyan Sea, Halsey ordered the task group to reverse course on the night of 23/24 October.[47]
Battle off Samar
Movements during the battle - The task group was too far away to intervene when the Japanese surprised the American escort carriers off the coast of Samar on the morning of 25 October with their force of battleships and cruisers, but McCain's carriers were able to close the distance enough by the early afternoon to launch two long-range airstrikes that accomplished little. The Americans lost 14 aircraft to all causes and failed to significantly damage any of Vice Admiral Takeo Kurita's ships. The following morning, after TG 38.1 and 38.2 rendezvoused, they launched an 257-aircraft airstrike that attacked Kurita's ships.[48] Avengers from Hornet and Cowpens hit the light cruiser Noshiro with one bomb that started a quickly extinguished fire. About 20 minutes later another Avenger put a torpedo into the cruiser; the detonation disabled all of her boilers and left her dead in the water. About an hour and a half after that, 28 of Hornet's Avengers and Helldivers hit Noshiro again with a torpedo and she sank an hour later.[49]
Japanese cruiser Nachi under air attack from task group 38.3 in Manila Bay 5th Nov 1944
1. Map of the Japanese and American fleet movements during the Battle off Samar Leyte Gulf Philippine Sea 25th Oct 1944.
2 - 4. Japanese cruiser Nachi under air attack from task group 38.3 in Manila Bay 5th Nov 1944Afterwards TG 38.1 resumed their interrupted voyage to Ulithi on the 27th. Four days later McCain relieved Mitscher as commander of TF 38 and Rear Admiral Alfred Montgomery assumed command of TG 38.1. The task group, together with TGs 38.2 and 38.3 returned to the Philippines in early November and attacked airfields in Luzon on 5 November, claiming to have destroyed 439 aircraft, most on the ground, while losing 36 aircraft to all causes. The aviators sank the heavy cruiser Nachi, an oiler and a cargo ship. On 11 November a troop convoy heading for Ormoc Bay was spotted; it was attacked by a large airstrike that sank five troop ships and four of the escorting destroyers despite its defending fighters for the loss of 9 US aircraft. Two days later TF 38 attacked Manila again and sank the light cruiser Kiso, four destroyers and seven merchant ships. The aviators claimed to have damaged 43 other ships and destroyed 84 aircraft while losing 25 aircraft. McCain attacked Manila again on 19 November, but with much less effect; sinking three merchantmen, damaging 13 others and claimed to have destroyed 116 aircraft, mostly on the ground, for the loss of 13 planes in combat. TGs 38.1 and 38.2 attacked targets in Luzon on the 25th, sinking the crippled heavy cruiser Kumano and a few smaller ships, and claimed to have shot down 26 Japanese aircraft and destroyed 29 on the ground. Having interdicted the flow of reinforcements to Leyte and maintained control of the air over the Philippines, the carriers retired to Ulithi to recuperate now that the Army Air Force had enough operable aircraft of its own to assume those roles.[50] After Hornet arrived there, Clark hoisted his flag aboard her again, although he was not in command of the task group.[51]
The increasing threat from kamikaze suicide aircraft that had damaged seven carriers since the invasion of Leyte caused the navy to reassess its air group composition. Fighters were obviously needed more to intercept the kamikazes before they could reach the fleet so the groups were reorganized to consist of 73 fighters and 15 dive and torpedo bombers each. The change would take several months to implement and a single fighter squadron that large would prove to be too big for one man to lead, so they were split into two squadrons in January 1945.[52]
Battle of Mindoro
The temporary loss of the damaged carriers for repairs caused the reorganization of TG 38 in which Hornet was transferred to TG 38.2 for the upcoming operations in support of the assault on Mindoro scheduled for 5 December. The landings were postponed 10 days and TF 38 sortied on 11 December. The ship mustered 51 Hellcats, 15 Helldivers and 18 Avengers at this time. For this operation, the Army would cover all targets south of Manila, the escort carriers would provide direct support while the fast carriers would gain air supremacy over Luzon. Starting on the 14th, TF 38 flew continuous missions in support of that objective until they had to refuel three days later. The aviators claimed to have destroyed 269 aircraft, mostly on the ground, sunk a few merchant ships and heavily damaged roads and railroads while losing 27 aircraft in combat and 38 to accidents. The task force was unable to refuel on the 17th due to worsening weather and another attempt the next morning also failed before Halsey sailed unwittingly into the path of Typhoon Cobra later that day. Low on fuel, many ships were top-heavy and rolled heavily which sometimes broke aircraft free from their tie-down chains. Across the fleet 146 aircraft were destroyed, three light carriers were damaged when aircraft broke loose inside the hangars and three destroyers were sunk. The Third Fleet was able to refuel on 19 December, but follow-on operations over Luzon scheduled for the 21st had to be canceled when the Americans realized that the typhoon was over Luzon, so TF 38 returned to Ulithi.[53]
South China Sea raid 12th January 1945
Japanese cruiser Kashii sinking off the coast of French Indochina 12th Jan 1945
Japanese cruiser Kashii sinking off the coast of French Indochina 12th Jan 1945
On 30 December, TF 38 departed Ulithi to attack Japanese airfields and shipping in Formosa, French Indo-China, Luzon, China, the Ryukyus and the Pescadores Islands in support of the scheduled landings at Lingayen Gulf in Luzon on 9 January 1945 and to interdict the maritime traffic between the Japanese home islands and her conquests in Southeast Asia. The carriers first attacked Formosa on 3–4 January before turning to Luzon for airstrikes on the 6th and 7th and then returned to bomb targets in Formosa on the 9th. While claiming to have destroyed over 150 aircraft with little aerial opposition, the Americans lost 46 aircraft in combat and 40 more in accidents. With his obligation to cover the Lingayen Gulf area until the landings were done, Halsey's ships entered the South China Sea during the night of 9–10 January in search of the two Ise-class battleships that had been partially turned into seaplane carriers and had been mistakenly reported at Cam Ranh Bay.
After refueling on the 11th, the carriers flew off almost 1,500 sorties against targets in French Indochina and off the coast. Halsey turned his ships northward and attacked Formosa and the Hong Kong area on 15–16 January and reattacked Formosa on the 21st after having exited the South China Sea. Until this date, the Third Fleet had not been attacked by the Japanese, but the kamikazes badly damaged Hornet's sister Ticonderoga. En route back to Ulithi, TF 38's planes flew reconnaissance missions over Okinawa on 22nd January 1945 to aid the planned invasion of that island while also attacking Japanese positions. All told the carriers destroyed some 300,000 GRT of shipping and claimed to have destroyed 615 aircraft while losing 201 aircraft to all causes during their excursion.[54]
Volcano and Ryukyu Islands campaign 27th January 1945
On 27 January, Spruance relieved Halsey, Clark assumed command of TG 58.1 and brought Hornet back to the task group.[55] The fast carriers, now renumbered as TF 58, departed Ulithi on 10 February for full-scale aerial assaults on the Tokyo area scheduled for 16–17 February that were intended to isolate Iwo Jima. TF 58's pilots claimed to have shot down 341 aircraft and destroyed 190 on the ground; attacks on industrial targets were not very effective and little shipping was sunk, with the most notable example being the recently completed Imperial Japanese Army escort carrier Yamashio Maru. The Japanese admitted losing at least 78 aircraft in aerial combat while claiming to having shot down 134 aircraft themselves; the Americans lost 88 aircraft to all causes. The Japanese did not attack TF 58 during their time off the coast of Honshu.[56]
The carriers turned south late in the afternoon of the 17th to prepare to support the amphibious landings on Iwo Jima on 19 February. TG 58.1 was refueling on the day of the landing, but joined the other task groups providing close support for the Marines ashore on the 20th. Three days later, Spruance released the fast carriers to attack the Japanese Home Islands again in an attempt to neutralize the kamikaze threat. Bad weather limited the effectiveness of the airstrikes around Tokyo on 25 January; continued bad weather forced the cancellation of the airstrikes planned the following day despite moving southwards overnight. Mitscher refueled his ships on the 27th and turned south to attack Okinawa on 1 March before returning to Ulithi on the 4th. American claims were 52 aircraft shot down and more than 60 destroyed on the ground in exchange for 55 aircraft lost to all causes between 19 February and 1 March.[57]
While refitting in Ulithi, Air Group 17 relieved Air Group 11 aboard the Hornet before departing on the 14th for another series of attacks on Japan in preparation for the invasion of Okinawa. A Japanese reconnaissance aircraft spotted TF 58 on 17 March which allowed the Japanese to disperse their aircraft and hide them. American attacks on the airfields in Kyushu were largely ineffective and were fiercely opposed. Hornet's Fighter Squadron 17 encountered many fighters over Kanoya Air Field and claimed to have shot down 25 of them. Japanese attacks on TF 58 lightly damaged three carriers, none of which were under Clark's command. American fighter pilots claimed 126 aircraft shot down and the Japanese admitted losing 110 aircraft, including 32 kamikazes.[58]
USS Hornet (CV-12) experiences a near miss after it was attacked by a Japanese aircraft off Japan 19th March 1945
Reconnaissance aircraft had located the remnants of the IJN in Kure and Kobe on the 18th and Mitscher ordered TGs 58.1, 58.3 and 58.4 to attack the former port. The Japanese caught Clark's carriers with their decks full of aircraft, preparing to fly off the morning's airstrike, but all of the attack aircraft were shot down; one kamikaze crashed a thousand yards (910 meters) astern of Hornet and two other were splashed by her sister Bennington's gunners. After the airstrikes flew off, further Japanese attacks crippled her sister Franklin.[59] As they approached Kure, the 20 Hellcats of Hornet's Fighter-Bomber Squadron 17 encountered 40 fighters from the IJAAF's elite 434rd Kokutai. In a battle which lasted 25 minutes, six American and four Japanese fighters were shot down.[60] The total casualties from the day's fighting over Japan, including the engagement between VBF-17 and the 434rd Kokutai, was 14 American and 25 Japanese aircraft shot down.[61] The attacks on the warships in Kure were fairly ineffectual, with the American pilots lightly damaging four battleships and many other warships, but badly damaging only a single escort carrier and a light cruiser. Hornet lost 13 aircraft in combat during the day. The afternoon's scheduled airstrikes were canceled to allow TF 58 to protect its damaged ships as they withdrew; further attacks on 20 and 21 March failed to significantly damage any more ships.[62]
TF 58 aircraft began hitting Okinawa on 23 March. The following day, TG 581.1 reconnaissance aircraft spotted a convoy that consisted of two troop transports, an ammunition ship and five escorts off Amami Ōshima headed for Okinawa; an 112-aircraft airstrike from Clark's carriers sank them all. Mitscher's carriers continued to attack Okinawa, ultimately flying a total of 3,095 sorties in the last seven days of March. The Japanese heavily attacked TF 58 between 26 and 31 March and damaged 10 ships, at the cost of around 1,100 aircraft. On 1 April, Hornet's planes began to provide direct support to the forces landing on Okinawa. Five days later the Japanese launched a mass airstrike on 6 April that consisted to almost 700 planes, of which at least 355 were kamikazes. Mitscher cleared his flight decks of all non fighters and his pilots claimed to have shot down a total of 249 aircraft. Despite this, three destroyers, two ammunition ships, and one Landing Ship, Tank were sunk by kamikazes and eight destroyers, a destroyer escort and a minelayer were damaged. The following day, the Japanese continued to attack, albeit with fewer aircraft. Kamikazes damaged Hornet's sister Hancock, one battleship, a destroyer and a destroyer escort.[63]
Japanese Operation Ten-Go
Japanese battleship Yamato maneuvers while under attack by Task Force 58 planes in the Inland Sea 19th Mar 1945. A large fire burns aft of her superstructure and she is low in the water from torpedo damage.
Operation Ten-Go (Ten-gō sakusen) was the attempted attack by a strike force of 10 Japanese surface vessels, led by the large battleship Yamato. This small task force had been ordered to fight through enemy naval forces, then beach Yamato and fight from shore, using her guns as coastal artillery and her crew as naval infantry. The Ten-Go force was spotted by American submarines shortly after it put to sea on 6 April. Reconnaissance aircraft from TF 58 found the force the following morning and TG 58.1 began launching aircraft almost two hours later. Hornet's Avengers put at least one torpedo into the battleship, the first of the ten torpedoes and five bomb hits that sank her less than two hours later. Of Yamato's screening force, the light cruiser Yahagi and four of the seven destroyers were also sunk or scuttled. The Americans lost three fighters, four dive bombers and three torpedo bombers to all causes during the attack.[64]
On 8th April, TF 58 returned to its previous mission of providing support to the US forces ashore, although continued kamikaze attacks exacted a toll. A week later, Mitscher ordered a fighter sweep over Kyushu to focus Japanese attention on his ships rather the more vulnerable amphibious shipping sustaining the ongoing battle. His pilots claimed to have shot down 29 aircraft and destroyed 51 on the ground. His strategy worked and the kamikazes attacked TF 58 on 17 April, badly damaging Intrepid despite Clark's pilots claiming 72 attackers. The fast carriers returned to Okinawan waters and none of them were damaged by a kamikaze until 11th May 1945. When the weather worsened in late April, Mitscher sent TG 58.1 to Ulithi to refit and rest his exhausted crews on the 27th. After Clark's ships rejoined him on 12 May, Mitscher sent TG 58.1 and 58.3 the next day to attack airfields in Kyushu and Shikoku. Over 13–14 May, their pilots claimed to have shot down 72 aircraft and destroyed 73 on the ground while losing 14 aircraft. The Japanese evened the score when they badly damaged Enterprise on the 14th.[65]
The Gemini 3 spacecraft during recovery operations USS Intrepid (CVS 11) 23rd March 1965
The Gemini 3 spacecraft during recovery operations USS Intrepid (CVS 11) 23rd March 1965
Typhoon damage 5th June 1945
USS Hornet (CV-12) showing damage received in a typhoon on 5th June 1945
Halsey and McCain reassumed command and the task force resumed its former designation as TF 38 on 27–28 May, after the pace of aerial combat had slowed down. Bad weather forced the cancellation of air support over Okinawa on 30 May and on 1–3 June. Clark was able to refuel on the following day, despite worsening weather. He took his ships eastwards, hoping to avoid the developing typhoon to his southwest. Halsey, however, ordered him to steer northwestwards shortly after midnight on the 5th to position his ships for the planned airstrikes on Kyushu, which put TG 38.1 right into the path of the typhoon. Despite multiple requests to alter course to avoid the eye of the typhoon, the task group entered the eyewall region, where the most violent weather in a typhoon is located, around dawn when Clark was finally granted the freedom to maneuver. Shortly afterwards a massive wave crashed down on Hornet's bow which collapsed some 25 feet (7.6 meters) of her forward flight deck. Not long afterwards the same thing happened to Bennington and the bow was ripped off the heavy cruiser Pittsburgh. Only six men were killed during the storm, but 76 airplanes were destroyed or lost overboard and 70 were damaged. Both Hornet and Bennington were unable to launch their aircraft over the bow, as was proved when a Marine Vought F4U Corsair was flown off Hornet and almost immediately flipped over and spun into the sea.[66]
Clark ordered that the damaged sisters steam backwards at 18 knots (33 km/h; 21 mph) and launch their aircraft over the stern on 7th June as they provided the CAP over the task group. He detached Bennington for repairs the next day while Hornet's aircraft participated in the attack on Kanoya Air Field. On 9 April, McCain had Clark's aircraft demonstrate the effectiveness of napalm bombs on the coastal defenses of Okidaitōjima, southeast of Okinawa. The following day, his planes spotted for three battleships as they bombarded Minamidaitōjima. After arriving in Leyte on 13th June 1945, Clark relinquished command of the task group and Hornet was ordered home for repairs,[67] arriving in San Francisco on 7 July. Hornet earned seven battle stars and the Presidential Unit Citation for her service in the war.[68]
Her repairs and refit were complete by 13 September 1945, after which she was assigned to Operation Magic Carpet that had her ferry troops home from the Marianas and Hawaiian Islands, returning to San Francisco on 9 February 1946. Hornet was decommissioned on 15 January 1947 and assigned to the Pacific Reserve Fleet.[68]
Peacetime tensions: 1951 to 1959
USS Hornet (CVA 12) during the 1950's
1. USS Hornet (CVA 12) En route to Guantanamo Bay Cuba 10th Jan 1954
2. USS Hornet (CVA 12) at anchor when assigned to Air Task Group 4 (ATG 4) in the Western Pacific from 6th Jan to 2nd July 1958Hornet following her SCB-27A conversion
'Hornet was recommissioned on 20 March 1951, then sailed from San Francisco for the New York Naval Shipyard, where she was decommissioned on 12 May for conversion to an attack aircraft carrier CVA-12, under the SCB-27A upgrade program.'[68] Her sister Wasp badly damaged her bow in a collision on 26 April 1952; Hornet's bow was cut away and used to repair Wasp.[69] 'On 11 September 1953, she was recommissioned as an attack carrier. The ship then trained in the Caribbean Sea before departure from Norfolk on 11 May 1954 on an eight-month global cruise.'[68]
'After operations in the Mediterranean Sea and the Indian Ocean, Hornet joined the mobile 7th Fleet in the South China Sea to search for survivors of a Cathay Pacific Airways passenger plane, shot down by Chinese aircraft near Hainan Island. On 25 July, Hornet aircraft supported planes from Philippine Sea as they shot down two attacking Chinese fighters. After tensions eased, she returned to San Francisco on 12 December, trained out of San Diego, then sailed on 4 May 1955 to join the 7th Fleet in the Far East. Hornet helped to cover the evacuation of Vietnamese from the Communist-controlled north to South Vietnam, then ranged from Japan to Formosa, Okinawa, and the Philippines in readiness training with the 7th Fleet. She returned to San Diego on 10 December and entered the Puget Sound Naval Shipyard the following month for the SCB-125 upgrade.'[68]
'Following her modernization overhaul, Hornet operated along the California coast. She departed San Diego on 21 January 1957 to bolster the strength of the 7th Fleet until her return from the troubled Far East on 25 July. Following a similar cruise, 6 January – 2 July 1958,'[68] she entered Puget Sound Naval Shipyard in August, to begin the conversion into an anti-submarine warfare (ASW) carrier. 'On 3 April 1959, she sailed from Long Beach to join the 7th Fleet in antisubmarine warfare tactics ranging from Japan to Okinawa and the Philippines. She returned home in October, for training along the western seaboard.'[68] In the late 1950s, an anti-submarine air group consisted of one squadron with 20 twin-engined Grumman S2F Trackers ASW aircraft, a squadron of HSS-1 Seabat ASW helicopters and a detachment of Douglas AD-5W Skyraider airborne early warning (AEW) aircraft. A detachment of four McDonnell F2H Banshee fighters was often assigned to protect the other aircraft. After 1960, the ASW air group generally consisted of two squadrons of ASW aircraft, each of 10 Trackers, a helicopter squadron of 16 Seabats or Sikorsky SH-3 Sea Kings and an AEW detachment with Grumman E-1 Tracers. No fighters were assigned between 1960 and 1965. Afterwards, the ASW carriers sometimes received a detachment of Douglas A-4 Skyhawk attack aircraft.[70]
Vietnam and the Space Race: 1960 to 1970
Vietnam and the Space Race: 1960 to 1970
1. USS Hornet (CVS 12) was deployed to the Western Pacific from 17th May to 18th Dec 1960
2. USS Hornet (CVS 12) operating off the coast of North Vietnam 5th Sep 1967
3. USS Hornet (CVS 12) underway on 9th Aug 1968 shortly before her final Seventh Fleet deployment on 30th Sep 1968
4. USS Hornet (CVS 12) assigned Carrier Anti Submarine Air Group 59 (CVSG 59) in the Pacific Ocean circa in Dec 1968.
5. USS Hornet (CVS 12) assigned Carrier Anti Submarine Air Group 59 (CVSG 59) in the Pacific Ocean circa in July 1969Hornet preparing to retrieve the Apollo 11 Command Module Columbia, 24 July 1969
'In the following years, Hornet was regularly deployed to the 7th Fleet for operations ranging from the coast of South Vietnam, to the shores of Japan, the Philippines and Okinawa';[68] she also played a key part in the Apollo program, as a recovery ship for uncrewed and crewed spaceflights.[71] On 6 March 1965, a Sea King helicopter took off from Hornet in San Diego and flew to the aircraft carrier Franklin D. Roosevelt, off Naval Station Mayport, Florida, without refueling or landing. It covered a distance of 2,106 miles (3,389 kilometers) in 16 hours, 52 minutes, and set a Fédération Aéronautique Internationale world record for helicopters. This exceeded the previous record distance by more than 750 miles (1,210 kilometers).[72][73] Hornet was deployed to Vietnam for the first time from October 1965 to January 1966, by this time all of the ASW carriers had received the SCB-144 upgrade as part of the Fleet Rehabilitation and Modernization II program. They received an AN/SQS-23 sonar mounted in the bow, as well as improved displays in the Combat Information Center. During these deployments the carriers were responsible for escorting the attack carriers in the South China Sea and providing combat search and rescue. Their Skyhawks were occasionally used to attack ground targets.[74] On 20 September 1965, the destroyer Epperson's steering malfunctioned and collided with Hornet while refueling. Nobody was injured on either ship, but both were lightly damaged.[75]
On 25 August 1966, she was on recovery station for the flight of AS-202, the second uncrewed flight of production Apollo Command and Service Modules. The moonship rocketed three-quarters of the way around the globe in 93 minutes before splashdown near Wake Island. Scorched from the heat of its re-entry into the Earth's atmosphere, the Apollo space capsule, designed to carry American astronauts to the Moon, was brought aboard Hornet after its test; that command module is currently on display aboard Hornet.[76][77][78]
'Hornet returned to Long Beach on 8 September, but headed back to the Far East on 27 March 1967. She reached Japan exactly a month later and departed the Sasebo base on 19 May for the war zone.'[68] She operated in Vietnamese waters until October and returned for another deployment from November 1968 to April 1969. After the North Koreans shot down a Lockheed EC-121 Warning Star AEW aircraft on 14 April over international waters, Hornet was ordered to reinforce the American ships gathering in the area in what became a pointless show of force.[79]
Hornet recovered the three astronauts (Neil Armstrong, Michael Collins, and Buzz Aldrin) and their command module Columbia from the first Moon landing mission, Apollo 11, after splashdown about 900 miles southwest of Hawaii in the Pacific Ocean on 24 July 1969.[80] President Nixon was on board to welcome the returning astronauts back to Earth, where they lived in quarantine aboard Hornet prior to transfer to the Lunar Receiving Laboratory at Houston.[81] Hornet also recovered Apollo 12 on 24 November. Returning astronauts Charles Conrad, Jr., Alan L. Bean, and Richard F. Gordon, Jr., were picked up from their splashdown point near American Samoa.[82]
Retirement: 1970 to present
USS Hornet Museum; U.S. National Register of Historic Places; U.S. National Historic Landmark; California Historic Landmark
USS Hornet docked in Alameda Coordinates: 37°46′21.15″N 122°18′10.23″W
Area: Alameda NRHP reference No. 91002065 CHL No. 1029[83]
Significant dates: Added to NRHP 4th December 1991[84] Designated NHL 4th December 1991[85]Hornet was decommissioned 26 June 1970 and mothballed at the Puget Sound Naval Shipyard and Intermediate Maintenance Facility. She was stricken from the Naval Vessel Register on 25 July 1989. In 1991, she was designated a National Historic Landmark.[86][87][88] The carrier was donated to the Aircraft Carrier Hornet Foundation on 26 May 1998. On 17 October 1998, she was opened to the public as USS Hornet Museum in Alameda, California. She was designated a California State Historic Landmark in 1999,[83] and is listed on the National Register of Historic places, #91002065.[86]
Building on her status as an authentically restored aircraft carrier, Hornet has been featured in a number of film and television shows. Several TV shows have been recorded on board; and in 1997, she was the subject of an episode of the TV series JAG, the season-three opener titled 'Ghost Ship'. In 2004, she was the set for scenes from the movie XXX: State of the Union, which starred Ice Cube, and portions of the 2007 film Rescue Dawn, which starred Christian Bale, were shot on board. Hornet was both the subject and the setting of the independent film Carrier (2006).[89][90] Hornet also hosted the final task and finish line of the thirtieth season of the reality show The Amazing Race.[91]
Hornet also hosts CarrierCon, a fan convention for anime, video game, comic and cosplay fans. In 2023, CarrierCon collaborated with Azur Lane, a mobile game that features anthropomorphic 'shipgirls' including Hornet herself (designated as Hornet II to distinguish her from her previous Yorktown-class version).[92] Later that year, Hornet was chosen to host Azur Lane's live event celebrating the 5th anniversary of its English/worldwide release.[93]
Awards given to the USS Hornet (CV-12)
Awards given to the USS Hornet (CV-12) Presidential Unit Citation Meritorious Unit Commendation (3) China Service Medal (extended) American Campaign Medal Asiatic-Pacific Campaign Medal (7 battle stars) World War II Victory Medal Navy Occupation Service Medal (with Europe clasp) National Defense Service Medal (2) Armed Forces Expeditionary Medal (2) Vietnam Service Medal (6 battle stars Philippine Presidential Unit Citation Republic of Vietnam Meritorious Unit Citation (Gallantry Cross Medal with Palm) Philippine Liberation Medal (1 battle star) Republic of Vietnam Campaign Medal
-SB2C-Helldivers-enroute-to-attack-the-Japanese-fleet-during-the-Battle-of-Sibuyan-Sea-Oct-1944-01.jpg)
-SB2C-Helldivers-enroute-to-attack-the-Japanese-fleet-during-the-Battle-of-Sibuyan-Sea-Oct-1944-03.jpg)
-SB2C-Helldivers-enroute-to-attack-the-Japanese-fleet-during-the-Battle-of-Sibuyan-Sea-Oct-1944-04.jpg)
-SB2C-Helldivers-enroute-to-attack-the-Japanese-fleet-during-the-Battle-of-Sibuyan-Sea-Oct-1944-05.jpg)
-SB2C-Helldivers-enroute-to-attack-the-Japanese-fleet-during-the-Battle-of-Sibuyan-Sea-Oct-1944-08.jpg)
-SB2C-Helldivers-enroute-to-attack-the-Japanese-fleet-during-the-Battle-of-Sibuyan-Sea-Oct-1944-09.jpg)
-SB2C-Helldivers-enroute-to-attack-the-Japanese-fleet-during-the-Battle-of-Sibuyan-Sea-Oct-1944-11.jpg)
-SB2C-Helldivers-enroute-to-attack-the-Japanese-fleet-during-the-Battle-of-Sibuyan-Sea-Oct-1944-13.jpg)

-SB2C-Helldivers-enroute-to-attack-the-Japanese-fleet-during-the-Battle-of-Sibuyan-Sea-Oct-1944-17.jpg)
-SB2C-Helldivers-return-after-attacking-the-Japanese-fleet-Battle-of-Sibuyan-Sea-Oct-1944-18.jpg)
-SB2C-Helldivers-return-after-attacking-the-Japanese-fleet-Battle-of-Sibuyan-Sea-Oct-1944-19.jpg)
-SB2C-Helldivers-return-after-attacking-the-Japanese-fleet-Battle-of-Sibuyan-Sea-Oct-1944-20.jpg)
-SB2C-Helldivers-return-after-attacking-the-Japanese-fleet-Battle-of-Sibuyan-Sea-Oct-1944-21.jpg)
-SB2C-Helldivers-return-after-attacking-the-Japanese-fleet-Battle-of-Sibuyan-Sea-Oct-1944-22.jpg)
-SB2C-Helldivers-return-after-attacking-the-Japanese-fleet-Battle-of-Sibuyan-Sea-Oct-1944-23.jpg)
-after-strikes-on-Japanese-shipping-China-Sea-Jan-1945-80-G-469319.jpg)
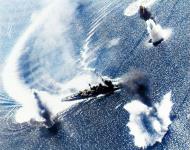
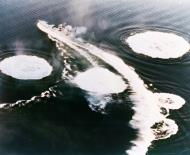
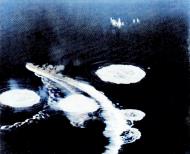
Bombing Squadron Eleven (VB-11) and the 'Happy Hornet'

Curtiss SB2C-3 Helldiver of VB-11 over a Japanese oiler off French Indochina USS Hornet II (CV-12) in Jan 1945
Article taken from scanned NARA files.
IV. The HAPPY HORNET
We soon found we had drawn a good ship. She was a first-class man o'war and lucky to boot. Watching the smoothness of her flight deck operations, noting the good work of her maintenance crews reflected in the daily availability reports, observing the seamanship and smartness with which she was maneuvered in the battle line, we knew she was one in a million ... knew we would have to do our best at all times to live up to her. And in retrospect it can be fairly stated that we did. Always the first in the task group to launch, the first to recover and re-spot, the ship's company were understandably jealous of her reputation, and when shortly after our arrival they complimented the group on its operations round the ship, we knew it was a real tribute.
Our quarters on the whole were comfortable and as commodious as was possible, the chow was ambrosial compared to what we had been forced to put up with the preceding four months, the airconditioned ready rooms and office spaces seemed luxury undreamed-of. Little things impressed us, too — small details that added much to cur life aboard. The helpfulness and consideration of the ship's company ... the way wc were summoned to dinner by the traditional call "Bully Beef for Old England" ... dinner music in the wardroom at evening chow once a week, a truly Ritz-like touch ... evening prayers over the speaker system nightly, reaching into the farthest corners cf the ship, reminding us all to pause for a moment to give thanks for the day past, to voice a hope for those to come ... the nightly newscast. Small points these, perhaps, but they go to make up the character, the personality of a ship. They are what makes a ship "happy".
A. First Sortie.
Shortly after the turn of October, we departed the Admiralties, and proceeded north by easy stages. Several group exercises and simulated attacks were scheduled en route to freshen us up after a month of no flying and to accustom us to the latest task force procedure. In no time at all, carrier landings became absurdly commonplace. They had to be when one realized that each time he took off he was going to have to land aboard again. Here the value of our intensive training and frequent refresher periods became quickly apparent. Landing accidents throughout the cruise were few and far between, and wav e-offs became more infrequent as we went along. The LSO, Lieutenant Carter, knew his business and we had complete confidence in his judgement and ability. He would get us aboard if there were any possible way, and he did. Speculation was naturally rife as to our destination. All we knew was that we Were on our way. Of course, this was our shakedown cruise, so we didn't expect anything too exciting. Then we got the dope. Our first target was to be the island of Okinawa in the Nansei Shoto Islands and we were to be the first carrier group ever to attack them. We got out the maps and looked it up. "See, there it is, between Formosa and the Japanese archipelago ... Looks' awful near Tokyo doesn't it? ... So, that's what they call a 3shakedown!
... Wonder what the Japs have there?"
Dawn had just broken over a calm season the- morning on the morning of October 10. Those of us who weren’t on the first hop crowded onto the flag bridge to see the takeoff. The fighters and torps were already-turning up their engines. Their exhausts flamed and flickered in the semi-darkness. "Start the bombers" commanded Fly One, and the 12 Beasts coughed once or twice and burst into a full-throated rear. "Launch planes" came the command, as the white flag replaced the red one on the air officer’s platform. The fighters took off and circled in the dim sky over the ship. Next the torps trundled down the long deck and heaved themselves into the cool morning air.
Last of all the Beasts reared down the wooden runway and soared away to join the rest for the first strike on Okinawa. It seemed to us on the flag bridge an historic moment, the culmination of months of planning and effort, "Good hunting!" we yelled, but the wind took our words and flung them back in our teeth. In all we put off four strikes that day. We hit the shipping in Naha Harbor twice, Naha Field once, and when the late afternoon clouds mode precision bombing impossible, we hit the. docks and warehouses of the town itself. Interception wag light and antiaircraft fire moderate at best. No doubt about it, we had caught the lap with his kimono down. That night we withdrew to the south-ward and early next day threw cut a strung fighter feint against Apari Airfield on northern Luzon, to put the enemy off his guard.
While he was still reeling from the punch, we brought the word to Formosa (also for the first time) and for three days we pounded it unmercifully. We struck big Heito Field, with its aircraft assembly plant, its hangars and its extensive dispersal areas, five times in ll. We dusted off Reigaryo Field and gave the Toko and Takao seaplane bases a going ever. We attacked Takao harbor, destined to be a fruitful hunting ground in later operations, and Bill Stratum did a nice job on a medium freighter. There were those on the ship who were net inclined tc credit this hit, but when we came back to Formosa two months later the ship was still waiting for us, high and dry on the beach. There was no further argument.
Meanwhile the Jap showed signs of recovering from this sudden and unexpected onslaught. The second and third nights off Formosa saw the sky alive with bogies, and the night fighters and dusk CAPs had a field day. Those who were cautious enough to go topside saw a marvelous show. The skies were brilliant with tracer, punctuated with sudden flashes as the big stuff went off. One Judy went in off our starboard quarter, too close for comfort, and two Bettys were flamed by our protecting cruisers not far off the port side. No doubt about it, we had stirred up a ‘Hornets nest’, and the little yellow fellows were swarming out, falling all over each other in their eagerness to join their honorable ancestors. When two cruisers assigned to protect us, each received a fish and had to be taken in tow, we realized that the thing was getting serious!
Next day, October 15, we retired again and refueled at sea, in itself a hazardous and fascinating operation. Over the radio, we heard Tokyo Rose describe our annellation. ‘It was rather like attending one’s own wake - quite exhilarating’ October 18 found us standing off the Luzon const, ready to strike the next blew in the series designed to disrupt the Japanese aerial lifeline in preparation for the Leyte landings. Here we had a taste of what determined anti-aircraft fire could mean. That day we flung two strikes on sprawling Clark field, with its numerous strips und many satellite installations. Two other Strikes were sent just south of Manila, where huge Nichols and Neilsen fields felt the force of cur bombs. In the latter area especially, the anti-aircraft was unusually intense and accurate, and over Neilsen the plane carrying Warren Sailer and his aircrewman, Duane Brash, were hit and burst into flame. As the plane fell over on its back before the 'final plunge, one occupant was observed to drop out and a minute later his parachute blossomed, below. In the absence of further information, both men are currently listed “missing in action." We are still hoping.
That night, as the task force withdrew and moved once more south-ward, we were informed that we were to fly in support of the amphibious assault on Leyte on the 20th. Here was another historic occasion. General MacArthur had said "I will return” and we were to see him make good his word. On the appointed day, we flew two hops against enemy installations in the Labiranan Head sector, north of Dulag, Leyte and at the extreme northern end of the southern beachhead. No fighter opposition and little anti-aircraft was encountered and these who were on the strike termed them little more than live-load exercises. The task group remained on call for a couple of days more, but there seemed to be little need of its services. Operations ashore were progressing according to schedule and the situation appeared well in hand. Consequently, we departed the area and headed for Ulithi an atoll in the Caroline Islands to replenish.
But the wily Jap was not completely too asleep. He was merely biding his time! And when the task force withdrew, he knew the hour to strike had come. On October 24, we were not far from Yap when we got the word. The Jap fleet was out.' We put helm hard about and headed back for Leyte under forced draft. This was the moment we had long been awaiting and anticipating. This was the chance at last to hit the Jap where it hurt him most, and hit him hard. Early next -morning, while still a long way from a possible launching point, we began to get news of the battle. Far to the north, the rest of our task force had pounced on the main Jap carrier force, inadequately escorted, its carrier’s decks practically denuded of planes. Four enemy carriers had been sunk. For to the south, the old battleships of Vice Admiral Kinkaid had ambushed a second Jap force in the tortuous waters of Surigao Straits, and cut it to pieces. In the middle, off the Leyte beachheads, however, lay the gallant little flattops whose aircraft had been flying support missions for the landings. Now they were at the mercy of a third enemy force of battleships and heavy cruisers, which had sortied from the San Bernardino straits. Our own task group was to proceed "without delay” to their relief. The jeeps had nothing but a few destroyers to support then. Unarmored and lightly-gunned, they would be an easy prey for the Japanese capital ships.
Would we be in time to save then?
Obviously there was not a moment to waste. At 1015 on October 25, when the scene of action was yet 350 miles away, the order came to the ready rooms: "Pilots, man your planes!’’ At 1035 the strike took off. Lt. Ford led the 12 bombers, each with 1500 lbs. of bombs. There had not been time to mount wing tanks. Immediately after takeoff, Bill Strahan’s plane developed engine trouble and after a couple of circles round the ship the engine conked out and he was forced to set her down. One of the escorting destroyers bustled over to the rescue and within ten minutes he and his aircrewman, Bob Koster, were squelching the water out of their boots on her deck. The rest of the group joined up rapidly, set course for Samar, and prayed they would be in time.
For three full hours-they bored on through the sky until at last they caught sight of rugged coast of Samar island in the distance. Almost immediately they saw what they were most anxious to see - a series of dark patches on the water below - the Jap fleet! But something had happened to scare them. They had already broken off their engagement with the baby carriers and were steaming north in full retreat headed back for the San Bernadino straits and safety.
The strike group took a quick swing up the enemy battleline to identify and select targets. Then George Ford broke off the bombers and led them over the center of the enemy disposition. Bomb bay doors sprung open, flaps split wide. Then the eleven Beasts poked their noses down and went into a screaming dive. Ack-ack was all around them - feathery phosphorus blobs, bursts of red, blue, green - all the colors of the spectrum. To each pilot and radioman it seemed as though every ship in the fleet below had selected his particular plane to sheet at. But they pressed the attack home, down, down, down till the altimeters read 1500 feet. Then bombs away and pullout for all you’re worth, jinking as you go. There were enemy fighter planes out, too. Four of our planes were intercepted, but the quick fire of the gunners kept them at bay until OUT!, escorting Hellcats could drive them off and splash them. Ford himself got a satisfying hit on the fantail of the Yamato, Hirohito’s newest and finest ship of the line. Pat Lynch dropped his egg amidships on a heavy cruiser of the Nachi class. One hit, scorer unknown but someone in the squadron, was registered on a Tone class heavy cruiser.
Once safely outside the enemy screen, the flight joined up and set out for the Hornet, still 250 miles away. When Ford developed trouble with his radio and was forced to go in and land at the newly-won strip at Dulag on Leyte, Carl Schwab took over the lead. Fuel was low and everyone’s mind was concentrating on getting every possible mile out of each gallon. 60 miles from base, Bill Armstrong and his gunner Jim Betsekas were forced to give up the unequal struggle! Spotting a destroyer, Armstrong set his plane down handily alongside. They were soon picked up. 30 miles further on, Schwab knew that he too was not going to be able to make it. Sighting another destroyer, he passed the lead over to, Boze Ervin and water-landed nearby. He and his radioman, Ray Crawford, were' soon aboard in good hands. Two other pilots could not wait for the Hornet to clear her decks and landed safely on other carriers. The remaining six planes landed aboard after an epoch-making 600-mile strike. Last in the gear was Art Dunlap, airborne six hours, with one and a half gallons left in his tanks.
Meanwhile, a second deck load had been launched at 1245, including nine bombers led by the Skipper. They, too, proceeded to the target area, participated in a coordinated attack during which two mere cruisers were hit, and then landed at Tacloban Field, Leyte. There they spent two nights and a day, until improvements on the field allowed them to take off and fly back-to the Hornet. It was here, on the first night at Tacloban, that Jack Cocks distinguished himself by volunteering as ISO for the navy planes coming in to land on the battered strip. With makeshift paddles and improvised field lighting, he successfully landed some 25 planes by night during intermittent enemy air attack, without a single casualty, thereby saving many lives and much valuable equipment, as well as keeping the field open for important intercept and strike missions.
The next day, October 26 was relatively quiet. We flew three long search-end-attack missions against the fleeing remnants of the Jap fleet in the Visayan and Sulu seas. Unfortunately, none of the flights was of any size, since so many planes were still on the beach at Leyte, and we had to be contented with minor damage to one light cruiser and one destroyer. By the following day, the remaining Jap ships were hopelessly out of range. The Tacloban flight returned, and the task group headed back for Ulithi an atoll in the Caroline Islands and a well-earned rest. LtCdr Smith was detached and LtCdr Sdwin Rroeger took ever the helm of Bombing Eleven, while we were in port.
B. Second Sortie.
Shortly after the first of November the task force sort led again and headed back for Luzon. The Japs had been heckling our forces on Leyte and we had been called on to give the Luzon airfields another going over in an attempt to reduce his air interference. On November 5, we were again off the eastern coast of Luzon, and launched three strikes against Clark field. Special attention was given to parked aircraft, and so far flung was the enemy's dispersal system there that three strikes were none too many. Strong anti-aircraft fire was again encountered, but it did no deter our pilots and gunners from strafing targets of opportunity, as they roared low across the field after pullout. On the first hop, the squadron got the two airborne planes officially credited to it, Doug Logan shot a Zeke down ahead of him, just as he was pulling out of his dive. The second made an overhead run on our formation after the rally and was shot down by the combined efforts of gunners Jim Kufeldt and Al Pierce. The last hop provided two exciting moments.
One when Ed Wilson ran out of gas and was forced to make a water landing. A picket destroyer gave him and his gunner, Harry Jespersen, the customary bell-hop service. The second was when Janicki was unable to-get his hook down and made a truly remarkable landing aboard, breaking his plane to a stop on the after elevator. For this extra-ordinarily skillful piece of flying he was awarded the Order of the Green Hornet, an informal local decoration. That evening, we with-drew again to the east and awaited developments.
November 11 was Armistice Day, celebrating the end of the war to end all wars. To us it seemed a grim and rather stale joke. That morning, we got wind of a Jap convoy moving up into Ormoc Bay on the western coast of Leyte with reinforcements for the hard-pressed enemy forces. The task force prepared to launch a haymaker the Hornet herself spotting 20 bombers for what was to be numerically our biggest strike of the tour. Our new skipper was leading it, when the Hornet flight arrived over the convoy, all the transports, five in all, had been hit by previous groups and were burning and smoking, our efforts then were turned to the escorting destroyers, and we sunk one and severely damaged a second. Excellent hits were scored by Ed Smith, Bill Strahan, Abie Fite, Art Dunlap, and Bill Armstrong, in spite of determined anti-aircraft opposition. The convoy was literally obliterated.
Again, we stood off the Philippines and waited patiently for more grist for our will. By the 13th, nothing had shown up and it was decided to break up Japanese reinforcement attempts at their source, accordingly, six strikes were directed against the shipping in Manila Harbor during the next tv/o days. We played havoc with the merchant vessels anchored there, registering good hits on the part of Ray Earl, George Ford, Carl Schwab, Dick Kenney, Pat Lynch, Dwain Oakley and Bob Ellis, Ack-ack from the extensive waterfront installations was severe and accurate, and one had to dive through a regular curtain of fire to get at the fat targets inside the breakwater. Nevertheless, most of our strikes dove there and remarkably few planes were hit. When we cleared the area on the afternoon of the 14th. Manila Harbor was a regular graveyard of burnt and sunken ships. It was a most gratifying sight.
Once more it was time to give our big flattops a "drink”, and we withdrew eastward to a fueling rendezvous. All hands were still feeling reasonably fresh, and it seemed like a good idea to hit Luzon again before returning to port. Accordingly, we took up our accustomed position off Luzon on the morning, of the November 19 and gave the island a thorough one-day going-over. We hit shipping in Manila Harbor, installations at Olongapo in Subic Bay (which turned out to be vastly overrated as a target) and had a final go at our old stamping ground, Clark Field. It was a busy day, but good targets were scarce and we were able to add little to our running score.
That night found us heading back to Ulithi and some relaxation. On the way back, the fighters made a sweep over the once-feared Yap, meeting little opposition and finding few targets worthy of note. Soon after we made port, a heavy blow fell. The powers that be decided to further streamline carrier bombing squadrons in order to conform more closely with current strategic needs. Consequently, a number of officers and men were detached at this time, and it was difficult to say goodbye to those who had shared our ups and downs for so long. Those leaving for other duty were: Lester Toler, Abie Fite, Fearless Firpo, "A.P." Miller, Louis Berry, Bill Armstrong, Art Dunlap, Frank Martin, Jim Shoffner, John ("gua gua")' Soahill, Jim Walker, Bob Ellis, Earl Janicki, Kenny Beck, Leo Suhor, John Cetanyn, Foxy Homan, Tex Cravey, Jim Betsekas, Walter White, Bill Emanuel, Lee Meisels, Edward Pickard, Moldy Rice, Andy Anderson, Gene Landry, and Al Pierce. All had done a good job and we wished them luok in their now billets.
C. Ulithi interlude.
For next three weeks, with but one slight interruption, we lay in a fine harbor at Ulithi atoll and took life easy. The interruption took the form of a Mysterious and abortive 2-day sortie, during which time we flew a couple of group exercises, just to keep our hands in, and then abruptly turned round and put in to Ulithi again. Whatever had taken us out had failed to materialize! Ulithi, taken over from the Japs with practically no opposition in early October, was a perfect example of a Pacific atoll.
A thin barrier reef flung protecting arms around a spacious lagoon, with here and there a small island where the coral had pushed far enough above the surface to catch soil and drifting seeds. These islands were low, palm-covered affairs, sun-drenched and wind-swept. Almost every day a tropical shower of short duration cleared the atmosphere and gave the thirsty vegetation new hope. It usually rained just in time to catch the liberty parties going ashore in the LCMs and give them a thorough drenching.
The largest island, Mogamog, was set aside chiefly for recreation purposes and every day those who had no duty aboard were free to go ashore and explore its wonders. There was swimming in the warm, clear waters of the lagoon, too shallow to accommodate an uninvited shark. Softball diamonds and volleyball courts called lazy muscles, inactive after long weeks afloat. Best of all, ice-cold beer in the shade of the whispering palms made the island a popular resort for all hands. The natives had all been moved to another island which was off limits, and sad to relate, none of us even caught a glimpse of a gay sarong. Hollywood had led us to expect far too much of the social life of the South Seas and the stark reality was disappointing. Most of the native huts, fascinating structures of coconut logs and native thatching were preserved unharmed. The inexhaustible Sea Bees had made repairs where necessary and even added a few imitations of their own, which, save for their tarpaulin roofs, could scarcely be distinguished from the local product. The old long hut or bachelor's house had been transformed into a Flag bar. Beer and cheer were dispensed to the lowlier officers at Crowley's Tavern. Transportation was always a real problem as the ate 11 suffered from a chronic shortage of boats, but somehow one usually managed to get back to the ship. At all events, no one ever was marooned on Mogamog overnight - or would admit it if he was.
D. Third Sortie.
About December 12, just when we had forgotten there was a war going on (haven't you heard?), we upped anchor once more and turned our bows towards the Philippines. Our job this time was to keep the Luzon airfields inactive while our forces leap-frogged from Leyte to their second landing on Mindoro, the Hornet was assigned a group cf secondary fields around Manila Bay which offered little in the way of rewarding targets. On the 15th and 16th of the month we sent strikes against Florida Blanca and Cabcaben fields Bataan, cleaning out most of the buildings at both places. We also took another swipe at shipping in Manila Harbor, and Bill Bourne was rewarded with a nice hit on a medium freighter. A fourth mission, search and attack, was dispatched to Subic Bay but found little of interest. That evening, the task force again withdrew eastwards.
Then Nature decided to take a hand in the proceedings. Up out of the southwest came a full-fledge typhoon, riding on high seas and bearing a bagful of tricks - fog, mist, sudden rain, squalls, howling winds, and waves so high they carried green water over the forward end of the Hornet’s flight deck. For five days we rode it out, the dipping and bowing sedately like the lady she was, the smaller vessels dancing like dervishes. It was fun to go aloft on the island and watch the fury of the gale. But it. was far from fun for the poor wretches who were being tossed like milkshakes in the cans and light cruisers. It was impossible to refuel, end every once in so often the impenetrable vail of water and mist would be drawn aside and one could see some lightly-laden destroyer wallowing in the trough of the seas. Finally the typhoon, like an errant child exhausted by his own willfulness’, took its departure and through still-heavy seas we made our way back to Ulithi to cry of "Eggnog at Mogamog."
E. Tropical Holiday.
From just before Christmas till New Year’s we lay in Ulithi. Mail and presents from home came aboard by the sacksful, and the office quickly took on a delicatessen aspect. Some industrious souls did a magnificient job of decorating the ready room and all hands gathered here for the two-hour jubilee show broad cast over the ship’s speaker system, Christinas Eve brought a Happy Hour with songs, stories, skits, a tree and Santa Claus himself, who came in on radar, his seasled towed by sea horses. The ship provided a magnificent feast and nothing was left undone that would make us feol more in the holiday mood. Still, it was a queer Christmas, in spite of everybody’s efforts. It was hard to catch the spirit with home and loved ones so many thousands of miles away across the blue, with sunny skies and palm-fringed shores smiting one in the eye whenever you went on deck.
F. Fourth and Final Sortie.
Full, of fruit cake and good intentions, we sort led from Ulithi in the dying hours of the old year on what was destined to be our last and most rewarding cruise, January 3 found us once mere off Formosa, That day the bombers put off a single strike led by Yoyo Yoder, which struck a convoy south of the Pescadores Islands. At least two good hits were scored by Ace Wiley and Bob Gallatin on a Large merchant vessel, which was left dead in the water, smoking heavily. Looking at the excellent photographs Jesse Baylor brought back, it seemed impossible that the vessel could have survived. Next day, through exceptionally adverse weather, the Skipper led a flight which had as its objective Tainan Field. However, that and every other good target was completely closed in, and we had to be content with causing several large fires and other destruction to a magnesium plant at Anping.
Following much the same strategy ns on our previous visit to these waters, we turned 3outh to take some more jabs at Luzon. MacArthur was preparing to launch his Philippine invasion from the Lingayen Gulf beachhead, and as usual we were to keep the enemy airfields as inoperative as possible. Mabalacat Field in Pampanga was our target area and we succeeded in getting one strike through, led by Ed Wilson, on the sixth. There were few planes at Mabalacat and no facilities worthy of the name. Our chief adversary continued to be the weather, and a second strike on the 6th and both strikes on the 7th were turned back before reaching their objective by an impenetrable, insurmountable wall of cloud. On the last strike, while passing through some clouds at high altitude, the plane containing Dick Aubel and Marion Young was seen to go into a spin. Though several planes went down and searched the surface of the sea below, no further trace of them was found. It was a sad and unavailing sacrifice, January 9 found us back at the old Formosan stand, ready to do more business. The bombers send one very successful strike against shipping in the ever-rewarding Takao Harbor. Hunting wo3 good. Despite the usual heavy-volume ack-ack from Apo Hill, sure hits on large merchant vessels were scored by Dwain Oakley, Jack Cocks, Bill Strahan and Doug Logan, with all the others on the mission being credited for probable’s or near-hits. This was without doubt one of our most productive strikes.
Then we looked around for new worlds to conquer. Someone suggested the South China Sea. There ought to be targets a-plenty, fat and unsuspecting, along the shores of China and even Indo China. Besides, there were reports that sizable Jap fleet units were sheltering in Camranh Bay, at first blush it looked like sheer suicide. No task force had ever ventured in their before. Why, it was nothing but a Japanese Lake. But we had been first at Okinawa, first at Formosa, well then, we'd be first at Saigon, too — and even at Hong Kong, and before we knew it, we were deep into the dangerous waters, pushing south under forced draft, come what might.
A banner day was January 12. The first strike, launched almost within sight of the Indo China Coast, found Camranh Bay deserted, but further south off Lagan Point was a convoy of oilers, heavily escorted. The entire task force strike group fell on this convoy and literally chewed it to bits. All five tankers were left aflame from stem to stern, with black smoke plumes towering thousands of feet above their decks. All the escorts were sunk or damaged. It is doubtful if more than one or two ships of the entire convoy escaped. The squadron accounted for at least one oiler on its own, with Schwab and Oakley scoring direct hits and Cocks being credited with a probable. The second strike ranged almost to Saigon and back without locating a target and was forced to return to base by shortage of fuel. But the third strike, led by George Ford, located another convoy north of our position, off Cap Hirondelle. The bombers took the escorting light cruiser of the Katori class for their target and Ray Earl, Soupy Campbell, Bob Gailatin and Charlie Cardon all rang the bell with 1000lb bombs. The torps put a fish in her too, and she settled under the waves within five minutes. The fighters strafed the merchant vessels and all of them turned shorewards and beached themselves, several in flames. The fourth strike harassed the remnants of the convoy, several destroyer escorts, and sent them packing. This was without question our finest day's work.
The Jap was stunned at this audacity. Heretofore he had been accustomed to looking on the South China Sea as practically home waters, where his ships could come and go at will ... bearing reinforcements south ... bearing north the mineral spoils of his captured colonial empire, and here was a task force turning up his own backyard, so to speak. Never had there been such panic in protected coastal waters since John Paul Jones made the first Ranger the scourge of the Irish Sea. While the enemy was wondering where we would strike next, we turned up Formosa yet again, launching two strikes against shipping in the The Pescadores islands on the 15th of the month. Both of these were disappointingly unproductive, due chiefly to the same poor weather which had hampered us before. One of our planes was severely hit by anti-aircraft over Boko Ko, but the pilot, Boze Ervin, managed to nurse it back as far as one of the picket destroyers. There he made a water landing, and got safely, out of the plane with his radioman Bill Rivers. Rough seas made it difficult to stay afloat, and Ervin was finally rescued, unconscious, by a sailor who dove off the destroyer and carried a line to him. Sadly, enough Rivers was not saved.
Then we struck Hong Kong itself in a memorable one-day raid. The first strike, led by the Skipper, set afire three large vessels in the Tai Koo dockyards at Kowloon and probably gutted them. The second strike was sent against the Kowloon dockyard and did some damage to the installations there. The third strike was one that will be long remembered by those who took part in it. The targets, large merchant vessels and escorts, lay in the well-defended anchorage between Hong Kong and Kowloon, ack-ack from positions on both shores was intense and accurate, added to that was the anti-aircraft fire of the ships themselves. It was a veritable inferno of crossfire. Of the five planes on the hop, only Ray Earl succeeded in scoring a direct hit aft on a 10,000 Ton oiler. He deserves great credit for scoring under such hazardous conditions. That night, the task force withdrew to the south to refuel.
For several days we cruised around off the west coast of Luzon, waiting for the weather to clear so we could retire around the northern tip. At one point it looked as though we should have to exit to the south, through Surigao Straits, but finally the weather cleared sufficiently for us to run the gauntlet. And a gauntlet it was, Jap planes attacked the task group just ahead of us with savage ferocity and all hands stood to general quarters for several hours. Fortunately, the wily Nips made only a couple of passes at our own task group and we came through unscathed.
On January 21, we came back for our last hammer at Formosa, of four strikes that day, two went to Takac, where the Skipper, George Ford, Ed Smith, Soupy Campbell, and Rube Schultz all get good hits on merchant ships; one went to the Toshien Naval Base also known as Takao Naval Base, where the loader, Ed Wilson, scored on a new light destroyer, and the last hop returned once more to Heito Field, just to make sure it wouldn’t feel slighted, and did considerable damage to dispersed aircraft. Then for a wind-up, we ended cur tour the way we started it, and struck Okinawa next day. In all we dispatched three flights on the 22nd, to Machinato town on Okinawa, Yon Tan and Ie Shima air fields. Opposition was practically nil at all three, and damage was limited only by the shortage of available targets. That night, to the undisguised joy of all hands, we were on our way back to Ulithi.
Rumors flew thick and fast, and the scuttlebutt' worked overtime.
We were going back to the states ... we weren’t going back ... we were going to Guam ... we were going to Pearl ... we were going to stay for one mere operation. A ‘tote’ was established on the ready room blackboard to try to keep abreast of the rapidly-changing odds. Even after we cast anchor in Ulithi, speculation still ran rife and no confirmation of anything including the time of day could be had for love nor money. In fact, it wasn’t until we sat on our gear on the hangar deck on the morning of February 1st that most of us realized that the incredible and long-awaited had finally taken place. We were relieved. We were going home. Late that afternoon we transferred to the USS Kasan Bay, and at this writing we are proceeding steadily eastward over calm seas. Two days should find us in Pearl Harbor. Perhaps another ten in Frisco. Nobody much cares. The important thing is, we are on our way.
V. STATISTICAL.
During the four-month tour of combat duty, the squadron flew 490 strike sorties for a total of 23,358 man-hours and 171,500 miles of flying, exclusive of routine searches and patrols.
368 tons of high explosives were dropped on enemy shipping and installations, while 22,150 rounds of 20 mn and 20,500 mounds of cal, 30 ammunition added to the discomfiture of the enemy.
Two enemy aircraft were downed in aerial combat and an estimated 75 were destroyed on the ground.
Two enemy warships — a destroyer and a light cruiser – were sunk, and 13 warships — a battleship, two heavy cruisers, one light cruiser, four destroyers, two destroyer escorts, one minelayer and two PC boats — were damaged, a very respectable task group in itself.
Eight enemy merchant vessels totaling 46,000 GT were sunk by the squadron, and 32 ships totaling 156,500 GT were damaged.
A total of 12 airfields - eight of them major and four of lesser importance — and two seaplane bases felt the striking power of the squadron.
Extensive damage was done to docks and harbor installations at Naha, Takao, the Pescadores, Toshien, Manila, Hong Kong and Kowloon.
One aircraft assembly plant and one magnesium plant were also hard hit.
One horse was inadvertently killed by 20mm fire.
VI. CHRONOLOGY
1943
24 September - VB-11 re-formed by order of ComFair Alameda.
25 September - Lt. Charles Allen Skinner, USNR (84061) appointed Acting Commanding Officer.
27 September - First planes (SBD-3) received.
30 September - Lt. Cdr. Raymond Bernard Jacoby, USN (72312) reports aboard and assumes command.
19 October - 36 planes and 48 pilots available.
27 October - Navy Day Air Parade.
28 October - Ensign Fred Homer Kater, USNR (290495) killed.
1 November - Lt.Cdr. Jacoby detached, Lt. Skinner resumes acting command.
15 November - Lt.Cdr, Lloyd Addison Smith, USN (75066) reports aboard and assumes command.
25 November - Squadron receives first SB2C-1C.
14 December - Transfer to NAAS Santa Rosa.1944
7 January - Transfer back to NAS Alameda.
11 February - Ensign William Herbert Graebner, USNR (263705) killed.
24 February - Transfer to NAAS Crow’s Landing.
12 March - Commence carrier qualification on USS Altomaha.
14 March - Complete carrier qualification.
19 March – Transfer to NAS Alameda.
26 March - Excess personnel depart for San Diego on USS Rudyard Bay.
27 March - Remaining personnel fly planes to NAS North Island.
30 March - Departed North Island on USS Wasp.
4 April - Arrive NAS Ford Island, Pearl Harbor.
6 April - Fly to NAS, Hilo, Hawaii.
23 May - William Saylor Culver, Ensign, USNR (290469) and Hall, John Phillip, ARM3c, USNR (5555605) killed.
1 June - Lieutenant (j.g.) Thomas Jack Warren, USNR (123273) killed. Ellis, Eads and Anderson escape by chute.
19 June - Transfer to NAS Barber’s Point Oahu.
26 June - Lieutenant (j.g.) Johnny Wilson Patterson, USNR (122007) and Cox, Robert Ronald, ARM2c, USNR (5536129) killed.
3 July - Ensign-Jack Anderson, (JSNR (173713) and Swaim, Joyce Eugene, ARM2c, USNR (6308749) killed.
5 July - Commence carrier refresher on USS Ommaney Bay.
6 July - Complete carrier refresher.
12 July - Ensign Thomas William Ooghe, USNR (290506) and Carey, William Peter, ARMlc, USNR (6110615) killed.
15 July - Lieutenant (j.g.) Ernest Eirpo, USNR (264327) and Hudson. Orion Douglas, ARM2c, USN (2691794) water-landing. Rescued.
21 August - Lieutenant Skinner, Executive Officer, detached to assume command of VB-13, Lieutenant Eugene Maurice Yoder, USNR (86055) appointed Executive Officer.
25 August - Commence carrier refresher on USS Ranger.
27 August - Complete carrier refresher.
3 September - Commence night carrier qualifications on USS Ranger.
4 September - Compete night carrier qualifications. Fly to NAS Ford Island and turn in planes.
5 September - Depart NAS NAS Barber’s Point Oahu and go to USS General O.H. Ernst.
7 September - Enlisted personnel depart on USS Breton.
USS General O.H. Ernst (AP-133) a Navy transport in San Francisco Bay California USA circa 1945 NH 83398
9 September - USS General O.H. Ernst departs Pearl Harbor.
20 September - Touch at Guadalcanal.
22 September - Touch in at Finschafen New Guinea.
24 September - Arrive, Lorengau anchorage Manus, Admiralty Islands.
26 September – Depart USS General O.H. Ernst to Ponam Manus Naval Base via LCI.
29 September - Depart Ponam Manus Naval Base via LCI by USS Hornet.
10 October - Nansei Shoto - Okinawa - Naha Harbor – Shipping Naha A/F, Naha Town and docks.
11 October - VF strike on Aparri A/F – Luzon.
12 - 14 October - Formosa - Takao area - Heito A/F, Reigaryo A/F, Takao Harbor, Takao S/P Base Toko S/P Base.
18 October - Philippines - Luzon - Clark A/F, Nichols A/F, Neilson A/F Warren James Sailor, Lieutenant’ (j.g.) USNR (173449) and Brash, Duane Frederick, AEM3c, USNR (7300434) down in flames over Neilson A/F. Missing.
20 October - Philippines - Leyte - Support amphibious assault - Labiranan Head.
25 October - Philippine Sea - Off Samar - Jap-Fleet:
1st strike, 3 water-landings: Strahan-Koster, Armstrong-Betsekas, Schwab-Crawford.
2nd strike landed at Tacloban A/F.
26 October - Philippines - Visayan and Sulu Seas - Jap Fleet remnants.
1 November - Lt.Cdr, Smith detached. Lieutenant Yoder, Acting Commanding Officer.
5-6 November -Philippines - Luzon - Clark A/F.
6 November - Wilson-Jespersen water-landing. Rescued, Janicki no-hook landing.
7 November - Lt.Cdr, Edwin John Kroeger, USNR (79075), reports aboard and assumes command.
11 November - Philippines - Leyte - Ormoc Bay – convoy.
13-14 November - Philippines - Luzon - Manila Harbor - Ships and docks.
19 November - Philippines - Luzon - Subic Bay – ships Clark A/F
21 November - VF strike on Yap
15 December - Philippines - Luzon - Florida Blanca (Del Carmen) Cabcaben A/F, Olongapo NB, Manila Harbor - ships
-in-Jan-1945.jpg)
-a-Navy-transport-in-San-Francisco-Bay-California-USA-circa-1945-NH-83398.jpg)
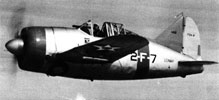 |
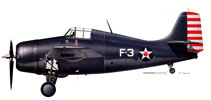 |
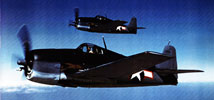 |
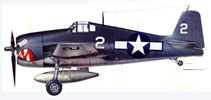 |
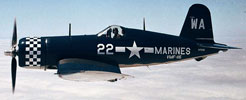 |
- Flight Simulators
IL-2 Sturmovik 'Cliff's of Dover' Blitz - has no 3D model
IL-2 Sturmovik Battle of Stalingrad - has no 3D model
DCS World - has no 3D model
USN Top Fighter Pilot by Squadron and Leading Commanding Officer including Unit Total Kills Squadron # Nickname Start End A/C Carrier/Base Top Ace (kills w/ sqn) CO (kills w/ sqn) Kills # Aces VF-1 High Hatters Nov-43 Aug-44 F6F Yorktown CV-10 Richard Eastmond (9) B.M. Strean 100 3 VF-2 Rippers Mar-44 Sep-44 F6F Hornet CV-12 Cdr. William A. Dean (10) 240 28 VF-3 Felix the Cat Dec-41 May-42 F4F Lexington CV-2 Butch O'Hare (5) Jimmy Thach 18 1 May-42 Jun-42 F4F Yorktown CV-5 Elbert McCuskey (5) Jimmy Thach 34.5 1 VF-5 Aug-42 Oct-42 F4F Saratoga CV-3 H. M. Jensen (7) Leroy Simpler 78 4 Oct-43 Apr-44 F6F Yorktown CV-10 Robert Duncan (7) Ed Owens (5) 93.5 7 VF-6 Shooting Stars Dec-41 Oct-42 F4F Enterprise CV-6 Donald E. Runyon (8) James S. Gray 63 1 VF-6 Aug-43 Feb-44 F6F various CV's Alexander Vraciu (9) H.W. Harrison 37.5 0 VF-7 Sep-44 Jan-45 F6F Hancock CV-19 Lt. Cdr. L. J. Check (10) 72 2 VF-8 Dec-41 Jun-42 F4F Hornet CV-8 Merrill Cook (2) Sam Mitchell 5 0 Mar-44 Oct-44 F6F Bunker Hill CV-17 Cdr. William Collins (9) 156 13 VF-9 Cat o' Nines Oct-43 Mar-44 F6F Essex CV-9 Hamilton McWhorter (10) Phil Torrey 116 10 est. Mar-45 Jun-45 F6F Yorktown CV-10 Eugene Valencia (23) John S. Kitten 129 10 est. VF-10 Grim Reapers Oct-42 May-43 F4F Enterprise CV-6 Swede Vejtasa (7.25) J.H. Flatley 43 1 Jan-44 Jun-44 F6F Enterprise CV-6 Richard Devine (8) William Kane 88 5 Feb-45 Apr-45 F4U Intrepid CV-11 P. L. Kirkwood (8) Walter E. Clarke 87 7 VF-11 Sundowners May-43 Jul-43 F4F Guadalcanal Charles Stimpson (6) Charles White 52 2 Oct-44 Jan-45 F6F Hornet CV-12 Charles Stimpson (10) E. G. Fairfax 106 5 VF-12 Sep-43 Jun-44 F6F Saratoga CV-3 John Magda (4) R.G. Dose 20 0 Jan-45 Jun-45 F6F Randolph CV-15 Lt. Cdr. Frederick H. Michaelis (5) 51 2 VF-13 Black Cats Jul-44 Nov-44 F6F Franklin CV-13 Albert Pope (7) Wilson Coleman (6) 86 3 VF-14 Iron Angels May-44 Nov-44 F6F Wasp CV-18 William Knight (7.5) R. Gray 146 8 VF-15 Fighting Aces May-44 Nov-44 F6F Essex CV-9 McCampbell, Duncan, Rushing, Strane, Twelves James Rigg (11) 310 26 VF-16 Fighting Airedales Oct-43 Jun-44 F6F Lexington CV-16 Alexander Vraciu (10) Paul D. Buie (9) 136.5 7 VF-17 Jolly Rogers Oct-43 Mar-44 F4U Solomons Ike Kepford (16) Tom Blackburn (11) 152 11 VF-18 Oct-43 Mar-44 F6F Bunker Hill CV-17 Lt. Cdr. Sam Silber (6) 74 1 Aug-44 Nov-44 F6F Intrepid CV-11 Cecil Harris (22) Ed Murphy 176.5 13 VF-19 Satan's Kittens Jul-44 Nov-44 F6F Lexington CV-16 William Masoner Jr. (10) T. Hugh Winters (8) 155 11 VF-20 Aug-44 Jan-45 F6F Enterprise CV-6/etc. Douglas Baker (16.33) Fred Bakutis (7.5) 158 9 VF-21 Feb-43 Jul-43 F4F Guadalcanal Ross Torkelson (6) John Hulme 69 3 Jul-44 Oct-44 F6F Belleau Wood CVL-24 Bob Thomas (5) V. F. Casey 40 1 VF-22 Sep-44 Jan-45 F6F Cowpens CVL-25 Clement Craig (12) Thomas Jenkins 49.5 3 VF-23 Aug-43 May-44 F6F Princeton CVL-23 L.H. Kerr (4.83) H.L. Miller 35 0 VF-26 Apr-44 Oct-44 FM2 Santee CVE-29 Kenneth Hippe (6) Harold Funk 31 1 VC-27 Oct-44 Jan-45 FM2 Savo Island Ralph Elliott (9) P. W. Jackson 61 1 VF-27 May-44 Oct-44 F6F Princeton CVL-23 James Shirley (12) Fred Bardshar (7.5) 134 10 VF-28 May-44 Dec-44 F6F Monterey CVL-26 Oscar Bailey (5) Roger Mehle 55 2 VF-29 Oct-44 Apr-45 F6F Cabot CVL-28 Robert Murray (10.3) William Eder (6.5) 113 12 VF-30 Jan-45 Jun-45 F6F Belleau Wood CVL-24 James Reber (11) Douglas A. Clark 110 7 VF-31 Meat Axers Jan-44 Sep-44 F6F Cabot CVL-28 Cornelius Nooy (19) Bob Winston 165.5 14 VF-32 Outlaw's Bandits Mar-44 Oct-44 F6F Langley CVL-27 Lt. Cdr. Eddie Outlaw (6) 44 2 VF-33 Aug-43 Jan-44 F6F Solomons Frank Schneider (7) Hawley Russell 74.5 3 VF(N)-41 Aug-44 Jan-45 F6F Independence CVL-23 William Henry (9.5) T. F. Caldwell 46 2 VF-42 Dec-41 May-42 F4F Yorktown CV-5 Art Brassfield (4.83) Oscar Pedersen 25 0 VF-44 Crusaders Oct-44 Feb-45 F6F Langley CVL-27 Cdr. Malcolm T. Wordell (7) 47 3 VF-45 Nov-44 May-45 F6F San Jacinto CVL-30 James B. Cain (8) Gordon Schechter 81.5 6 VF-47 Fighting Cocks Mar-45 Aug-45 F6F Bataan CVL-29 Samuel Hibbard (7.33) Albert Clancy 67.5 1 VF-50 Devil Cats Apr-44 Jul-44 F6F Bataan CVL-29 Daniel Rehm (6) J.C. Strange 61 4 VF-51 Apr-44 Nov-44 F6F San Jacinto CVL-30 William Maxwell (7) C. L. Moore 50.5 1 VF-60 Nov-43 Oct-44 F6F Suwanee CVE-27 R. Singleton (3.25) H.O. Feilbach 25 0 VF-72 Jul-42 Oct-42 F4F Hornet CV-8 George Wrenn (5.25) Henry Sanchez 38 1 VF-80 Vorse's Vipers Nov-44 Jan-45 F6F Ticonderoga CV-14 Patrick Fleming (19) Leroy Keith 159.5 10 VF-82 Jan-45 Jun-45 F6F Bennington CV-20 Robert Jennings (7) Edward Hassell 85 5 VF-83 Kangaroos Mar-45 Sep-45 F6F Essex CV-9 Thaddeus Coleman (8) H.A. Sampson 137 11 VBF-83 Mar-45 Sep-45 F4U Essex CV-9 Thomas Reidy (10) Frank Patriarca 91 3 VF-84 Wolf Gang Jan-45 Jun-45 F4U Bunker Hill CV-17 Doris Freeman (7) Roger R. Hedrick 137 4
Naval Base Kitsap Bremerton, Washington Map
USS Hornet II (CV-12) citations notes:
USS Hornet II (CV-12) citations:
- Dictionary of American Naval Fighting Ships
- Chesneau, p. 104
- Raven, pp. 9–10, 16
- Friedman, pp. 155–156, 394
- Brown 1977, p. 61
- Friedman, pp. 140, 394
- Friedman, p. 151
- Friedman, pp. 138, 154
- Brown 1997, p. 60; Friedman, pp. 146, 394; Raven, p. 9
- Friedman, pp. 143, 398; Faltum, p. 158
- Faltum, p. 160; Friedman, p. 144; Raven, pp. 37, 66
- Chesneau, p. 105
- Raven, pp. 86, 97–98
- Faltum, pp. 160–161, 164
- Friedman, p. 134
- Faltum, p. 168
- Brown 2009, pp. 243–244
- Brown 2009, p. 244
- Polmar & Genda, I, p. 373
- Brown 2009, pp. 244–245; Faltum, p. 61; Polmar & Genda, I, p. 373
- Brown 2009, pp. 246–248; Polmar & Genda, I, pp. 373–374
- Rems, Alan (1 April 2016). 'Out of the Jaws of Victory'. Naval History. 30 (2). ISSN 1042-1920.
- Miles, Dwayne. 'USS Hornet Commanding Officers'. www.its.caltech.edu. USS Hornet Association.
- Brown 2009, pp. 252–255; Faltum, pp. 64–65; Polmar & Genda, I, p. 385; Reynolds, pp. 343–344
- Brown 2009, p. 255
- Brown 2009, p. 256; Faltum, pp. 65–66
- Brown 2009, pp. 257–258; Polmar & Genda, I, pp. 386, 388–391
- Brown 2009, pp. 259–260; Polmar & Genda, I, pp. 391–394
- Tillman 1994, p. 17
- Brown 2009, p. 260; Polmar & Genda, I, p. 394; Tillman 1994, p. 23
- Brown 2009, pp. 260–261; Polmar & Genda, I, p. 394
- Brown 2009, p. 262; Polmar & Genda, I, p. 394
- Brown, pp. 263–265; Polmar & Genda, I, pp. 398–400; Reynolds, pp. 360–364
- Faltum, p. 72; Polmar & Genda, I, pp. 406–407
- Faltum, pp. 72–73; Polmar & Genda, I, pp. 406–407
- Faltum, p. 192
- Reynolds, p. 384
- Polmar & Genda, I, pp. 409–410
- Brown, p. 266, Faltum, p. 76; Polmar & Genda, I, pp. 409–412, Prados, pp. 78–79
- Faltum, p. 76; Polmar & Genda, I, p. 412, Prados, pp. 79–80, 83–84
- Faltum, p. 77; Polmar & Genda, I, p. 413; Prados, pp. 86, 88–90
- Reynolds, p. 385
- Brown 2009, p. 269; Prados, pp. 118–120, 128
- Bates, Vol 1, p. 98.
- Bates, Vol I, pp. 100–117, 122; Brown 2009, p. 270; Prados, pp. 133–145
- Bates, Vol. II, pp. 181–182, 307–308, 311; Vol. III, pp. 103–104
- Bates, Vol III, pp. 109–113, 348–349, 579–582, 774, 776–777
- Faltum, p. 87; Polmar & Genda, I, p. 438
- Hackett, Bob; Kingsepp, Sander (2016). 'IJN Noshiro: Tabular Record of Movement'. www.combinedfleet.com.
- Brown 2009, pp. 276–277; Faltum, pp. 89–90; Polmar & Genda, I, pp. 440–443
- Reynolds, p. 392
- Brown 2009, p. 277; Faltum, p. 91; Polmar & Genda, I, pp. 445–446
- Brown 2009, pp. 277–278; Faltum, pp. 92–93; Polmar & Genda, I, pp. 446–447
- Brown 2009, p. 278; Faltum, pp. 93–95; Polmar & Genda, I, pp. 449, 455–458
- Reynolds, p. 397
- Brown 2009, p. 280; Faltum, p. 97; Polmar & Genda, I, pp. 463–464; Tillman 2010, pp. 119, 123
- Brown 2009, pp. 280–281; Faltum, pp. 97–98; Polmar & Genda, I, p. 467; Reynolds, pp. 402–403
- Brown 2009, pp. 281–282; Faltum, p. 99; Polmar & Genda, I, pp. 469–470; Reynolds, pp. 405–406; Tillman 2010, pp. 124–125
- Faltum, p. 99; Polmar & Genda, I, pp. 470–471
- Young, pp. 37–39
- Tillman 2010, p. 128
- Brown 2009, pp. 281–282; Faltum, pp. 99, 101; Polmar & Genda, I, pp. 474–475; Reynolds, pp. 406–408
- Brown 2009, p. 282; Faltum, pp. 102–104; Polmar & Genda, I, pp. 475–478, 480; Reynolds, pp. 411–413
- Faltum, pp. 103–104; Polmar & Genda, I, pp. 477–480; Reynolds, p. 413
- Faltum, pp. 104–105; Polmar & Genda, I, pp. 480–482; Reynolds, pp. 413–419
- Reynolds, pp. 419–425
- Reynolds, pp. 425–427
- 'Hornet VIII (CV-12)'
- Polmar & Genda, II, p. 95
- Faltum, p. 136–137; Polmar & Genda, II, 155–156
- 'Hornet Plus Three'. Archived from the original on 17 July 2011.
- Polmar & Genda, II, p. 209
- Swopes, Bryan R. (2017). 'USS Hornet (CVS-12) Archives'. This Day in Aviation.
- Faltum, pp. 137, 168, 159
- Melman, Stan (1996). 'Question 25/93: USN/USCG Collisions with Merchant Vessels'. Warship International. XXXIII (3): 319. ISSN 0043-0374.
- 'NASA - NSSDCA - Spacecraft - Details'. nssdc.gsfc.nasa.gov.
- Chariots for Apollo: A History of Manned Lunar Spacecraft Archived 4 February 2015
- 'Apollo & Other Space Program Artifacts'. USS Hornet Museum. 10 October 2018.
- Faltum, p. 168; Polmar & Genda, II, pp. 268–269
- 'Apollo 11 Command and Service Module (CSM)'. nssdc.gsfc.nasa.gov. NASA.
- 'A Front Row Seat For History'. Archived from the original on 19 March 2006.
- 'Apollo 12 Command and Service Module (CSM)'. nssdc.gsfc.nasa.gov. NASA.
- 'USS Hornet'. Office of Historic Preservation, California State Parks.
- 'National Register Information System'. National Register of Historic Places. National Park Service. 23 January 2007.
- 'USS Hornet (Cvs-12) (Aircraft Carrier)'. National Historic Landmark summary listing (where year designated appears as 1992, believe to be incorrect). National Park Service. September 28, 2007.
- 'Hornet (CVS-12) (USS) – 12/04/91'. List of NHLs by State. National Park Service.
- ''USS Hornet (CVS-12)', 18 June 1991, by James P. Delgado' (PDF). National Register of Historic Places Registration. National Park Service. 18 June 1991.
- 'USS Hornet (CVS-12)-Accompanying 4 photos, exterior, from 1943, 1944, 1945, and c.1969' (PDF). National Register of Historic Places Registration. National Park Service. 18 June 1991.
- 'Venue Rentals'. USS Hornet Museum. 12 January 2016.
- Carrier at IMDb Edit this at Wikidata
- Longeretta, Emily (21 February 2018). ''The Amazing Race' Season 30 Finale: Which Team Won?'. Us Weekly.
- CarrierCon (17 February 2023). 'CarrierCon 2023 Azur Lane Collaboration Announcement'. Instagram.
- CarrierCon [@CarrierConBA] (20 July 2023).
Bibliography:
- Bates, Richard (1953). The Battle for Leyte Gulf, October 1944: Strategical and Tactical Analysis, Volume I: Preliminary Operations Until 0719 October 17th, 1944, Including Battle off Formosa. n.p.: US Naval War College.
- Bates, Richard (1955). The Battle for Leyte Gulf, October 1944: Strategical and Tactical Analysis, Volume II: Operations 0719 October 17th until October 20th (D-day). n.p.: US Naval War College.
- Bates, Richard (1957). The Battle for Leyte Gulf, October 1944: Strategical and Tactical Analysis, Volume III: Operations from 0000 October 20th (D-day) until 1042 October 23rd. n.p.: US Naval War College.
- Brown, David (1977). Aircraft Carriers. World War 2 Fact Files. New York: Arco Publishing. ISBN 0-66804-164-1.
- Brown, J. D. (2009). Carrier Operations in World War II. Annapolis, Maryland: Naval Institute Press. ISBN 978-1-59114-108-2.
- Chesneau, Roger, ed. (1980). Conway's All the World's Fighting Ships 1922–1946. Greenwich: Conway Maritime Press. ISBN 0-85177-146-7.
- Faltum, Andrew (1996). The Essex Aircraft Carriers. Baltimore, Maryland: Nautical & Aviation. ISBN 1-877853-26-7.
- Friedman, Norman (1983). U.S. Aircraft Carriers: An Illustrated Design History. Annapolis, Maryland: Naval Institute Press. ISBN 0-87021-739-9.
- 'Hornet VIII (CV-12)'. Dictionary of American Naval Fighting Ships. Navy Department, Naval History and Heritage Command. 22 December 2004. Retrieved 20 April 2019.
- Polmar, Norman & Genda, Minoru (2006). Aircraft Carriers: A History of Carrier Aviation and Its Influence on World Events. Vol. I, 1909–1945. Washington, D.C.: Potomac Books. ISBN 1-57488-663-0.
- Polmar, Norman & Genda, Minoru (2006). Aircraft Carriers: A History of Carrier Aviation and Its Influence on World Events. Vol. II, 1946–2006. Washington, D.C.: Potomac Books. ISBN 978-1-57488-665-8.
- Prados, John C. (2016). Storm Over Leyte: The Philippine Invasion and the Destruction of the Japanese Navy. Dutton Caliber. ISBN 978-0-4514-7361-5.
- Raven, Alan (1988). Essex-class Carriers. Warship Design Histories. Vol. 2. Annapolis, Maryland: Naval Institute Press. ISBN 0-87021-021-1.
- Reynolds, Clark G. (2005). On the Warpath in the Pacific: Admiral Jocko Clark and the Fast Carriers. Annapolis, Maryland: Naval Institute Press. ISBN 1-59114-716-6.
- Tillman, Barrett (1994). The Marianas Turkey Shoot, June 19–20, 1944: Carrier Battle in the Philippine Sea. St. Paul, Minnesota: Phalanx Publishing. ISBN 1-883809-04-5.
- Tillman, Barrett (2010). Whirlwind: The Air War Against Japan, 1942–1945. New York: Simon & Schuster. ISBN 978-1-4165-8440-7.
- Young, Edward M. (2012). American Aces Against the Kamikaze. Oxford: Osprey Publishing. ISBN 978-1-8490-8745-2.
Magazine References: +
- Airfix Magazines (English) - http://www.airfix.com/
- Avions (French) - http://www.aerostories.org/~aerobiblio/rubrique10.html
- FlyPast (English) - http://www.flypast.com/
- Flugzeug Publikations GmbH (German) - http://vdmedien.com/flugzeug-publikations-gmbh-hersteller_verlag-vdm-heinz-nickel-33.html
- Flugzeug Classic (German) - http://www.flugzeugclassic.de/
- Klassiker (German) - http://shop.flugrevue.de/abo/klassiker-der-luftfahrt
- Le Fana de L'Aviation (French) - http://boutique.editions-lariviere.fr/site/abonnement-le-fana-de-l-aviation-626-4-6.html
- Le Fana de L'Aviation (French) - http://www.pdfmagazines.org/tags/Le+Fana+De+L+Aviation/
- Osprey (English) - http://www.ospreypublishing.com/
- Revi Magazines (Czech) - http://www.revi.cz/
Web References: +
- Wikipedia - https://en.wikipedia.org/wiki/Lexington-class_aircraft_carrier
- Wikipedia - https://en.wikipedia.org/wiki/Isoroku_Yamamoto

 Editor for Asisbiz: Matthew Laird Acred
If you love our website please donate so we can make this site even better !!